Things have been a bit busy around our house preparing for our baby to arrive...can't believe it should be in less than a week! I have been cooking some of our favorite recipes that can be frozen for when life gets crazy. However, that also means I haven't been making anything new to share. I finally tried a simple and quick recipe from my stack of printed and ripped out recipes.
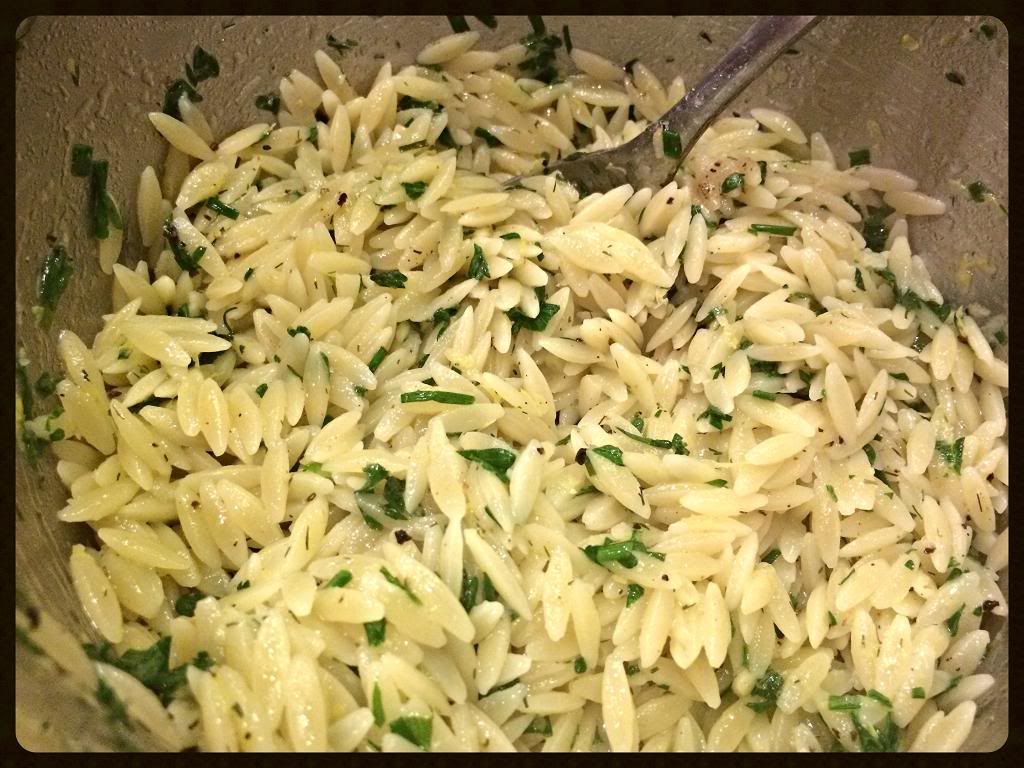
One of the great things about this is its freshness from the herbs and lemon, yet it is still versatile enough to pair with anything. We had it with my garlicky baked shrimp. Since we ate this with seafood we added some lemon juice in addition to the zest, it is all up to your personal preference. I plan to eat the leftovers cold for lunch either over mixed greens or add in some feta cheese for some salty tang.
Lemon-Herb Orzo
Source: Food Network Magazine
Ingredients:
1 ½ cups Orzo
3 Tablespoons unsalted butter
¼ cup chives, chopped
¼ cup dill, chopped
¼ cup parsley, chopped
1 lemon zested
Directions:
Cook orzo in boiling salted water until al dente per box, usually about 8-10 minutes. Reserve 1/4 cup cooking water.
Toss orzo with butter, chives, dill, parsley and lemon zest. Add reserved water if you need to loosen. Season with salt and pepper to taste.
Thursday, November 21, 2013
Saturday, October 19, 2013
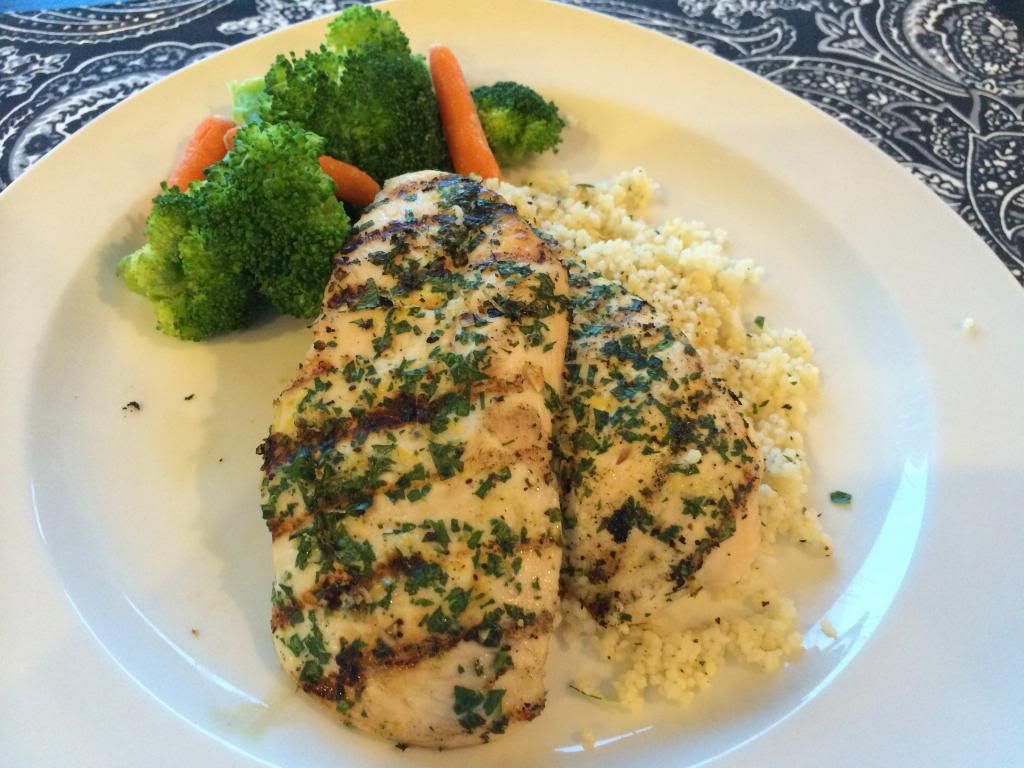
Lemon-Parsley Chicken with Herbed Couscous
I must admit that while we subscribe to a lot of magazines, lately they have ended up sitting in a pile for months. Yesterday I needed some inspiration for dinner and finally tackled part of the pile and pulled out this recipe from the September issue of Cooking Light. Grilling is year round in Florida so I was lucky that wouldn't be an issue, but I am sure you can always use a grill pan if necessary. The parsley and lemon combination gave the chicken and couscous a light and refreshing flavor.
Lemon-Parsley Chicken with Herbed Couscous
Source: Cooking Light Magazine - September 2013
Serves: 4
Ingredients:
¼ cup minced fresh flat-leaf parsley
2 teaspoons grated lemon zest
2 teaspoons minced fresh garlic
½ teaspoon kosher salt
½ teaspoon fresh ground black pepper
4 (6oz)skinless, boneless chicken breast halves
1 cup couscous
2 Tablespoons chopped fresh flat-leaf parsley
1 Tablespoon melted butter
2 teaspoons fresh lemon juice
¼ teaspoon kosher salt
¼ teaspoon freshly ground black pepper
Directions:
Preheat grill to high heat
Combine minced parsley, lemon zest, garlic, salt and pepper in a small bowl. Sprinkle chicken with mixture and let stand for 10 minutes.
Place chicken on grill rack coated with cooking spray and grill for 3 minute each side, or until chicken is done.
Meanwhile, bring 1 ¼ cups water to a boil in small saucepan. Stir in 1 cup uncooked couscous; cover. Remove from heat and let stand covered for 5 minutes. Stir in parsley, butter, lemon juice, salt and pepper.

Friday, September 20, 2013
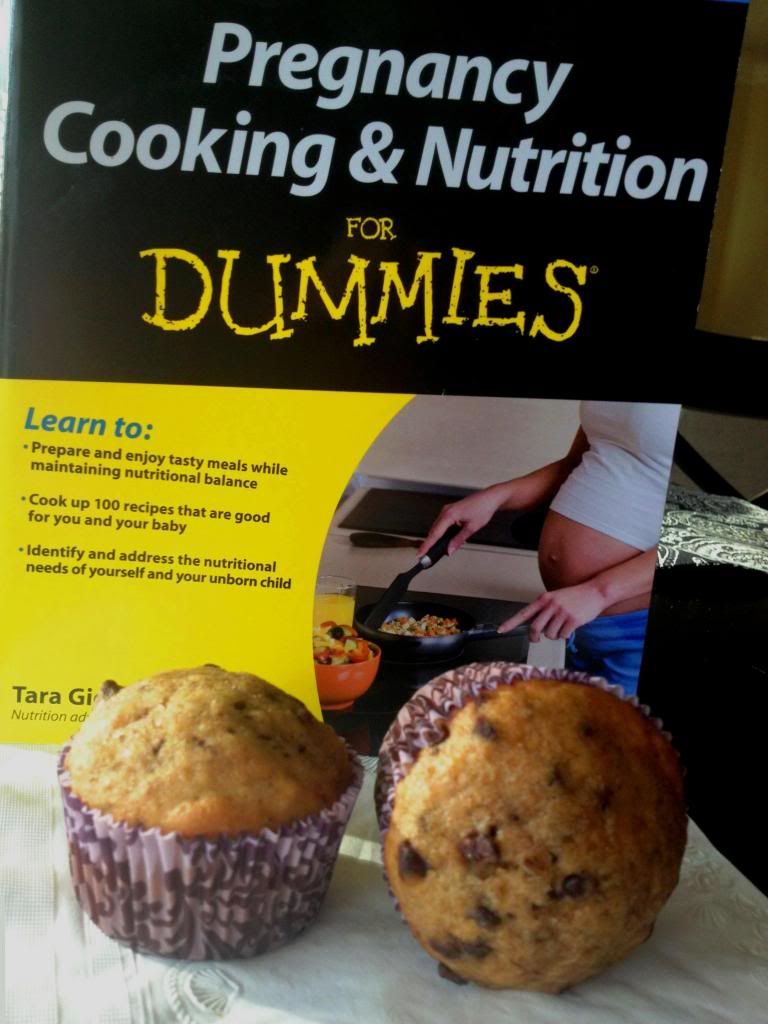
Oh, Baby! Banana Chocolate Chip Muffins
Knowing how much I usually enjoy cooking, my sweet father-in-law bought me a book Pregnancy Cooking & Nutrition for Dummies. It mainly has healthy eating recipes with some interesting notes about ingredients that are better to have during pregnancy to help promote growth for various aspects of the baby throughout pregnancy. These muffins were a great morning snack and not too sweet. The bananas keep them nice and moist with hint of sweetness from chocolate chips. They are a great source of fiber, folate, iron, and potassium and can be enjoyed even if you aren't pregnant!
Oh, Baby! Banana Chocolate Chip Muffins
Source: Pregnancy Cooking & Nutrition for Dummies
Yields: 12 muffins
Ingredients:
¾ cup all purpose flour
¾ cup whole wheat flour
¼ cup ground flaxseed
1 ½ teaspoons baking powder
¼ teaspoon baking soda
1/8 teaspoon salt
2 eggs
1 cup mashed ripe bananas
¾ cup sugar
3 Tablespoons canola oil
½ cup chopped walnuts
½ cup mini chocolate chips
Directions:
Preheat oven to 350F. Line muffin pan with liners or non-stick spray
In a large bowl, sift together the all purpose and whole wheat flours, flaxseed, baking powder, baking soda and salt.
In a medium bowl, beat the eggs with a fork and stir in the mashed bananas. Add the sugar and oil and stir the mixture with a spoon to blend well.
Add the egg and banana mixture to the large bowl of dry ingredients. Stir the mixture until combined well. Stir in the walnuts and chocolate chips.
Fill the muffin cups 2/3 full. Bake for 20-25 minutes or until the muffin tops are browned and a toothpick inserted comes out clean. Allow muffins to cool then enjoy!

Thursday, September 5, 2013
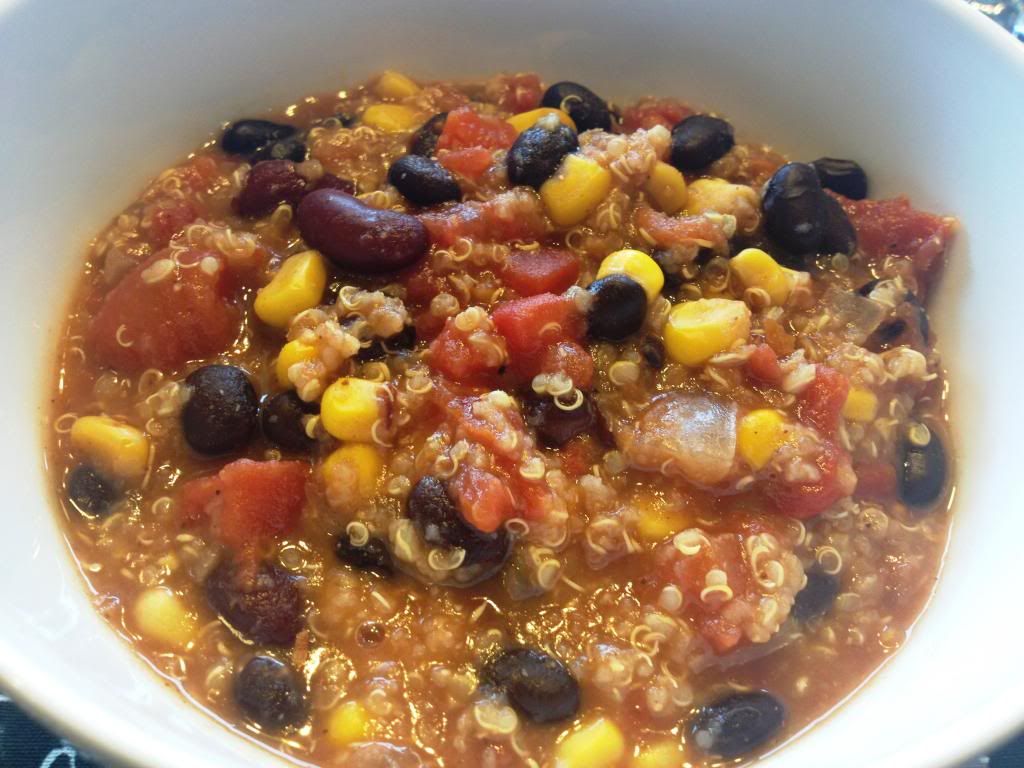
Slow Cooker Quinoa Chili
This is one of the easiest meals to make and no one will ever know! Anyone with a slow cooker knows that the greatest part is how you can throw everything in then go about your day and dinner will be ready when you get home. Dishes like this are even easier because they use a lot of dried goods so you don't have to go to the store. The only downfall when using canned vegetables is that they can be high in sodium, so I used all low sodium versions to cut back and be sure to wash them to rinse off some of the sodium as well. Be sure to compare even those because each brands idea of low sodium is different and in many cases the store brand is the best. This chili is packed full of protein from all of the beans and quinoa. If you are a football fan, this would be great for game day, especially as we get into September and maybe some cooler weather in parts of the country.
Slow Cooker Quinoa Chili
Source: Six Sisters Stuff
Serves: 8
Ingredients:
1 cup quinoa, rinsed
1 (28 oz) can reduced sodium diced tomatoes (undrained)
1 (14 oz) can diced tomatoes with green chilies (undrained)
2 (16 oz) cans reduced sodium black bean, drained and rinsed
1 (15 oz) can of corn, drained
1 (15 oz) can of reduced sodium kidney beans
2 cups reduced sodium chicken or vegetable stock
1 bell pepper, seeded and chopped
1 minced onion
1 tsp garlic
1 tsp cumin
1 tsp crushed red pepper
1 tsp chili powder
1 bell pepper, seeded and chopped
1 minced onion
1 tsp garlic
1 tsp cumin
1 tsp crushed red pepper
1 tsp chili powder
Directions:
Place everything in a 6 quart slow cooker and cook for 5-7 hours on low. Keep warm until ready to serve.

Saturday, August 17, 2013
Spicy Shrimp with Garlic and Parsley
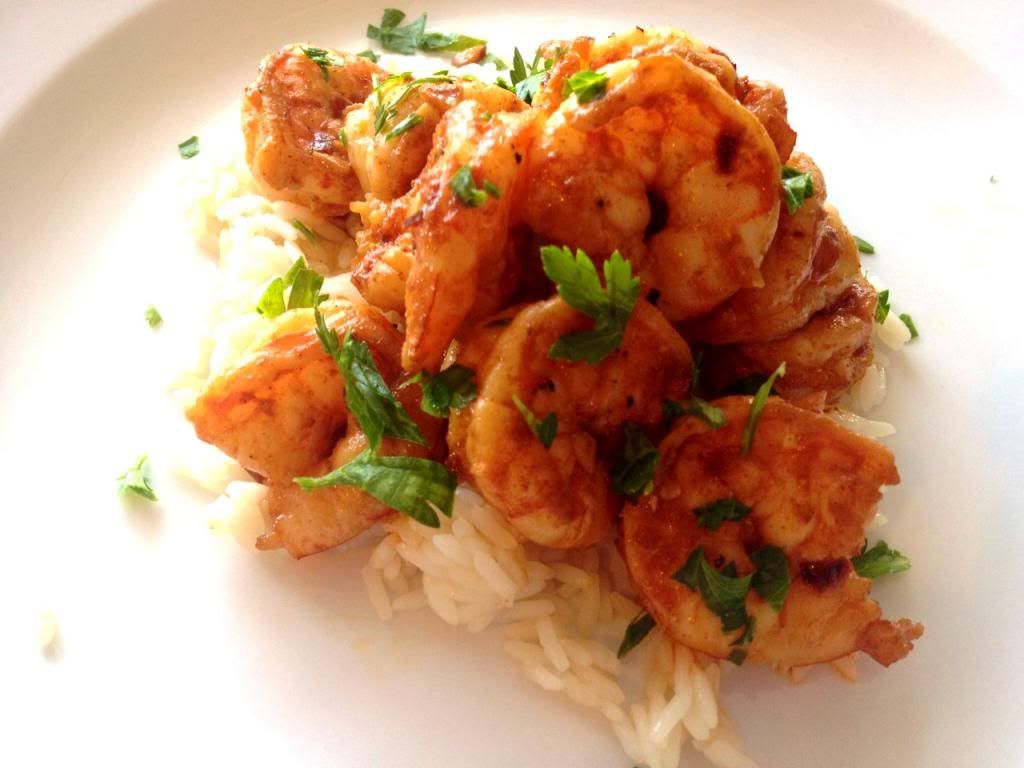
The name of this dish does not lie, this shrimp dish definitely has a kick. We had ours over a bed of white rice to soak up some of the spicy sauce and it was delicious. It can also be served over pasta, just add another tablespoon of olive oil and be sure to use the 2 tablespoons each of lemon juice and wine to create a thinner sauce.
Since shrimp cook in under 5 minutes this is an extremely quick meal that is perfect for a busy night and you won't feel like you skimped on anything. And shrimp are something that are not too expensive in the frozen section so we usually have a bag on hand in the freezer meaning you don't even have to go to the grocery store to make this!
Spicy Shrimp with Garlic and Parsley
Serves: 2
Ingredients:
3 Tbs. olive oil
2 garlic cloves, finely minced
1 tsp. red pepper flakes
1 tsp. sweet paprika
1 lb. medium shrimp, peeled and deveined
1 to 2 Tbs. fresh lemon juice
1 to 2 Tbs. dry white wine
salt and freshly ground black pepper, to taste
chopped fresh parsley
Directions:
Place olive oil in a saute pan over medium heat and warm.
Add garlic, pepper flakes and paprika.
Saute for 1 minute until fragrant.
Increase heat to high, add the shrimp, lemon juice and dry white wine, stir well, and sauté until the shrimp turn pink and are opaque throughout, about 3-5 minutes.
Season with salt and black pepper, sprinkle with the parsley and serve.

Monday, August 12, 2013
Peppered Pork Loin
Happy Monday! Hope everyone had a great weekend! We enjoyed our weekend and I was glad to be back cooking. As many people know, I am a fan of the Food Network, but now also their show The Next Food Network Star. The season finale was on last night, so it was only appropriate to make a dish featured by my favorite on the show, and the winner! While I didn't make the sweet potato biscuits or apple butter the peppered pork loin was packed full of flavor. The chili and black peppers definitely give this a kick, and the molasses provided a hint of sweetness. However, if you aren't a fan of spice dial down the amount of pepper. Instead of making the sweet potato biscuits, we had a baked sweet potato and got a lot of the sweetness from there. Hopefully her new show on the Food Network will have many more delicious recipes to try.
Peppered Pork Loin
Source: Damaris Phillips for Food Network
Serves: 6-8
Ingredients:
2 Tablespoons sorghum or molasses
1 Tablespoon salt
2 Tablespoons freshly ground black pepper
1 teaspoon crushed red pepper flakes
2 Tablespoons vegetable oil
4-pound pork loin
Peppered Pork Loin
Source: Damaris Phillips for Food Network
Serves: 6-8
Ingredients:
2 Tablespoons sorghum or molasses
1 Tablespoon salt
2 Tablespoons freshly ground black pepper
1 teaspoon crushed red pepper flakes
2 Tablespoons vegetable oil
4-pound pork loin
Directions:
In a small bowl, stir together the sorghum, salt, black pepper, crushed red pepper and oil. Trim the pork loin of any excess fat, and transfer to a shallow roasting pan (or my favorite, a cast-iron skillet). Rub the pork loin with sorghum and spice mixture, coating evenly. Roast at 350F until the internal temperature is 150 degrees F, about 45 minutes. Remove from oven and let rest for 10 minutes.

Wednesday, July 31, 2013
Spinach, Broccoli & Feta Crustless Quiche
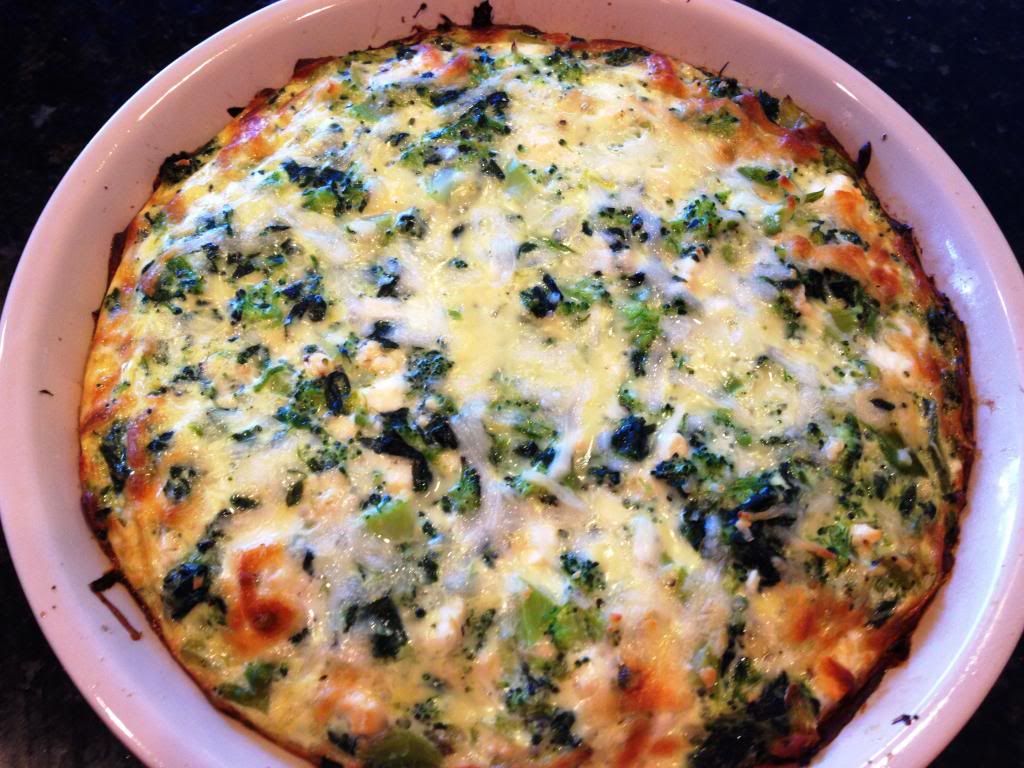
It seems that lately I am struggling to get all of my veggies in for the day. An easy way I have found to help with that is by making a crustless quiche for dinner. They are pretty healthy, full of protein from the eggs and packed with veggies. This particular one I used up some frozen spinach and broccoli in the freezer, but the original called for mushrooms. You can use whatever you have on hand or your favorite vegetables, the base will remain the same. The best part is that this can be made for basically any meal. Even if you have it for dinner like us, leftovers can be eaten for breakfast, lunch or dinner the next day!
Spinach, Broccoli & Feta Crustless Quiche
Adapted from: Tasty Kitchen
Serves: 6
Ingredients:10 ounces, weight Frozen Spinach (defrosted and drained)
10 ounces, weight Frozen chopped broccoli (defrosted and drained)
2 ounces, weight Feta Cheese, Crumbled
6 Eggs
8 ounces, fluid skim Milk
⅛ cups Parmesan Cheese, Freshly Grated
⅛ cups Mozzarella Cheese, Shredded
Salt And Pepper, to taste
Directions:
Preheat your oven to 350F. If your frozen spinach and broccoli are not already thawed, thaw it in the microwave according to package instructions. Empty the box into a colander and let it drain while you begin to prepare the rest.
Spray a pie dish with non-stick spray. Squeeze the rest of the water out of the spinach and spread it out on the bottom of the pie dish. Next add the broccoli and crumbled feta.
In a medium bowl whisk together the eggs until fairly smooth. Add the milk, Parmesan and another small sprinkle of pepper. Whisk to combine. Pour this mixture into the pie dish over the spinach, broccoli and feta.
Sprinkle the shredded mozzarella cheese over the top. Place the pie dish on a baking sheet for easy transfer into the oven. Place the quiche into the preheated oven and bake until it is golden brown on top and the center is solid. Every oven is different but this should take between 45 minutes and an hour. Slice and serve!

Wednesday, July 10, 2013
BBQ Baby Back Ribs
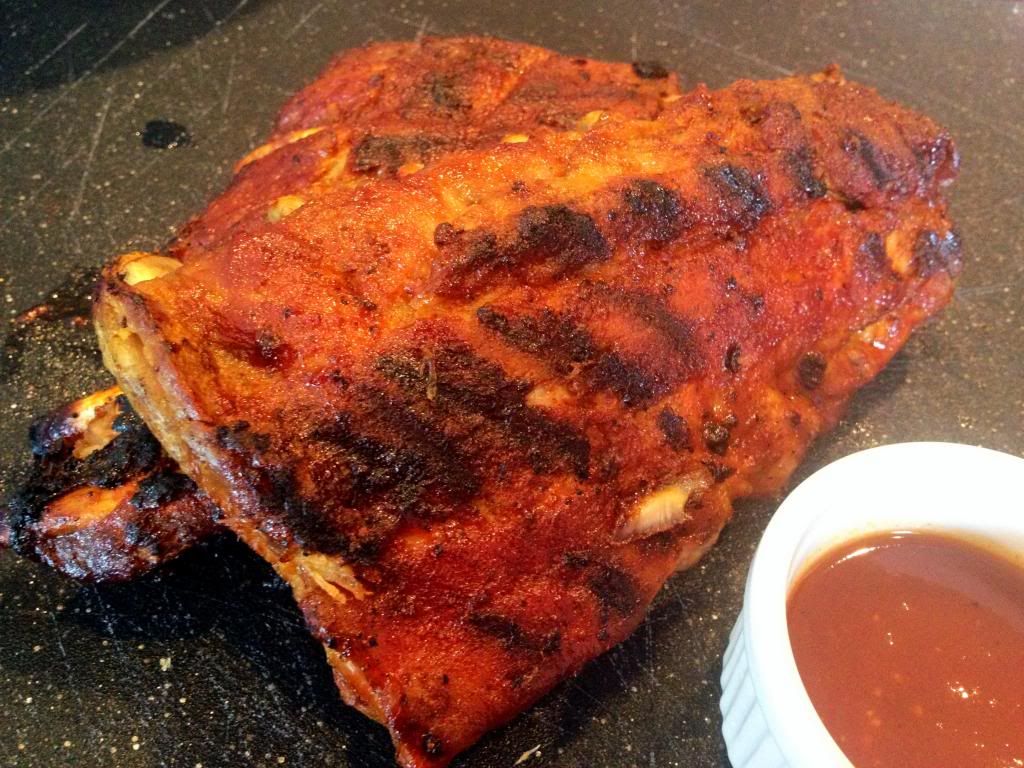
Summer weekends mean grilling pretty much wherever you live. It is always fun to have family and friends over and try out new rubs, sauces, marinades, etc. Normally, when we make ribs they are baked low and slow in the oven to ensure their tenderness. We really enjoyed this recipe because they start off in the oven to cook and become tender, then are finished on the grill to get a little crisp on the outside and infuse the ribs with the grill flavor. It also combined a dry spice rub that goes on in the oven with a homemade vinegar BBQ sauce at the end keeping them moist. The recipe for BBQ sauce is super simple, but does make a ton, so either cut it in half or you will have extra to put on top or use another time. Needless to say these were packed with flavor and fell off the bone.
BBQ Baby Back Ribs
Source: Jamie Deen
Serves: 4
Rub Ingredients:
2 Tablespoons light brown sugar
1 Tablespoon dry mustard
1 Tablespoon paprika
1 teaspoon smoked paprika
1 teaspoon freshly ground black pepper
1 teaspoon garlic salt
2 racks baby back pork ribs (4 pounds)
Jamie's BBQ Sauce, recipe follows
Directions:
Preheat the oven to 350 degrees
F.
Mix together the brown sugar,
mustard, paprika, smoked paprika, black pepper and garlic salt together in a
small bowl. Be sure to break up any lumps with your fingers. Reserve 1
tablespoon of rub in a small bowl for serving.
Remove the silver skin from the
underside of the ribs by sliding your fingers under the thin membrane and
pulling it off. Repeat with the second rack. Rub the ribs with the seasoning on
both sides. Place in a single layer in a large roasting pan and cover tightly
with heavy-duty foil. Place the roasting pan into the oven and bake until the
ribs are tender, about 1 hour 15 minutes.
Preheat the grill to medium heat.
Grill the ribs on each side for
15 minutes, watching and flipping when necessary, for 30 minutes total. Baste
with Jamie's BBQ Sauce the last 10 minutes. (The sauce goes on at the end
because it is sugar based and you don't want to burn your ribs.)
Let the racks rest 5 minutes
before slicing into individual ribs. Sprinkle the cut ribs with the reserved
dry rub and serve along with extra sauce.
Jamie's BBQ Sauce
Ingredients:
1 Tablespoon canola oil
2 Tablespoons finely chopped
onion
2 cups apple cider vinegar
1 1/2 cups ketchup
3/4 cup light brown sugar
3 Tablespoons Dijon mustard
1 Tablespoon Worcestershire sauce
2 teaspoons chili powder
1 teaspoon cayenne pepper
Kosher salt and freshly ground
black pepper
Directions:
Heat the oil in a medium saucepan
over medium-high heat. Add the onions and stir until softened. Add the vinegar,
ketchup, brown sugar, mustard, Worcestershire sauce, chili powder, cayenne
pepper and some salt and black pepper to the saucepan and simmer on medium-low
heat until thickened, about 35 minutes. Yield: About 4 cups.

Sunday, June 16, 2013
Greek Orzo Salad
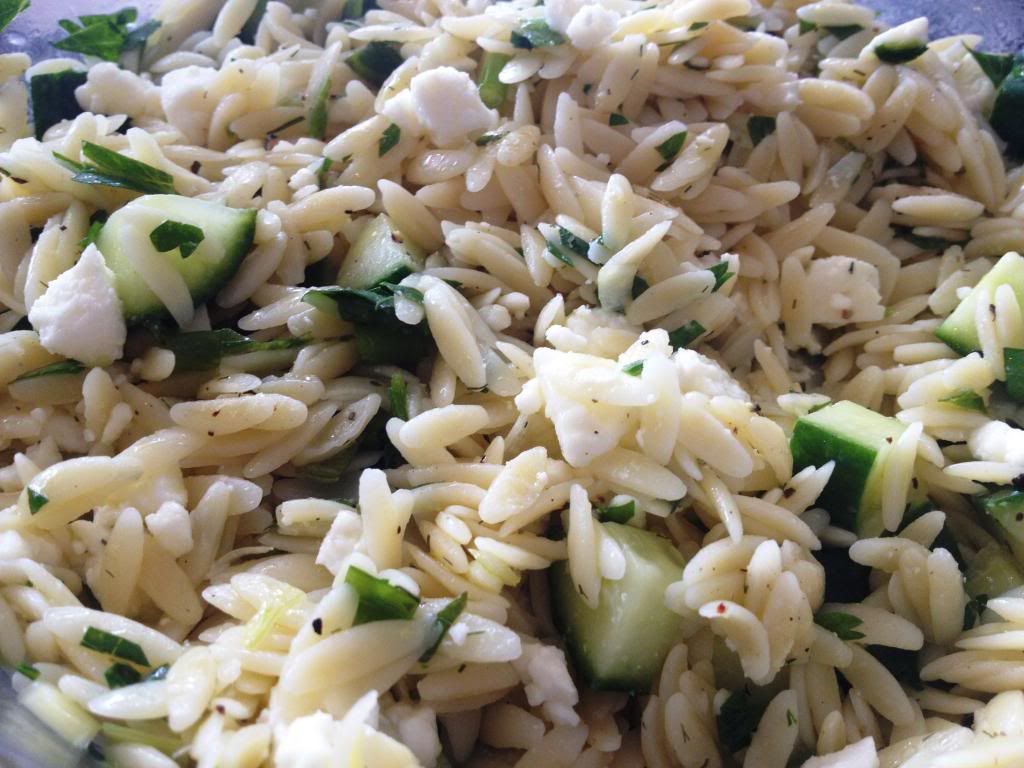
One of my favorite shows and cooks is the Barefoot Contessa. I had some free time the other day and she just happened to be on tv. Her summer orzo salad called to me through the tv. Hers was made with roasted shrimp, such a quick and easy way to cook them. However, I tweaked the recipe a tiny bit for my taste and what was in the house. It is nice and refreshing cool, flavorful salad that is perfect for these hot summer days and leftovers can be taken to work the next day since flavors merry even more with time.
Greek Orzo Salad
Adapted from Barefoot Contessa
Serves: 6
Ingredients:
Kosher salt
Good olive oil
3/4 pound orzo pasta (rice-shaped pasta)
1/2 cup freshly squeezed lemon juice (3 lemons)
Freshly ground black pepper
1/2 cup minced scallions, white and green parts
1/2 cup chopped fresh dill
1 cup chopped fresh flat-leaf parsley
1 English cucumber, unpeeled, seeded, and medium-diced
3/4 pound good feta cheese, large diced
8 pitted kalamata olives, chopped
Directions:
Fill a large pot with water, add 1 Tablespoon of salt and a splash of oil, and bring the water to a boil. Add the orzo and simmer for 9 to 11 minutes, stirring occasionally, until it's cooked al dente. Drain and pour into a large bowl. Whisk together the lemon juice, 1/2 cup olive oil, 2 teaspoons salt and 1 teaspoon of pepper. Pour over the hot pasta and stir well.
Add the scallions, dill, parsley, cucumber, onion, 2 teaspoons salt, and 1 teaspoon pepper to the orzo. Toss well. Add the feta and stir carefully. Set aside at room temperature for 1 hour to allow the flavors to blend, or refrigerate overnight. If refrigerated, taste again for seasonings and bring back to room temperature before serving.
Add the scallions, dill, parsley, cucumber, onion, 2 teaspoons salt, and 1 teaspoon pepper to the orzo. Toss well. Add the feta and stir carefully. Set aside at room temperature for 1 hour to allow the flavors to blend, or refrigerate overnight. If refrigerated, taste again for seasonings and bring back to room temperature before serving.

Labels:
Salad
Wednesday, June 5, 2013
Fish Piccata
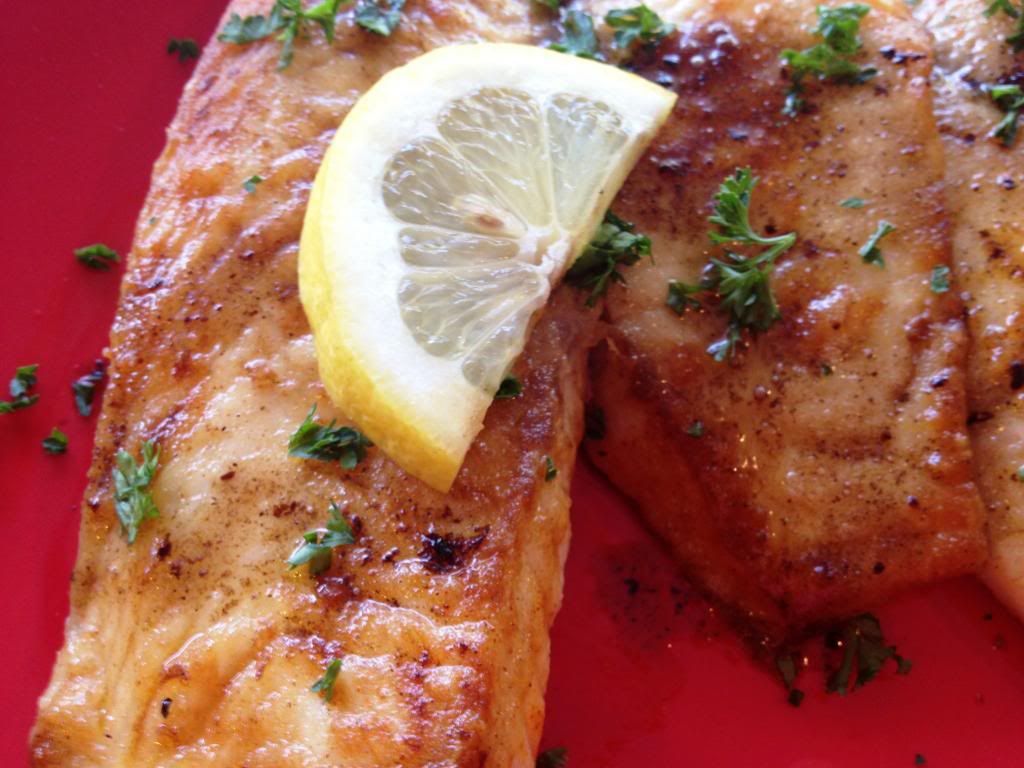
I was finally back in the kitchen after traveling and was inspired by all of the sole dishes we saw on our trip to Paris. Growing up my mom made a sole with lemon and capers that this reminds me of. The store was out of sole, so I used Tilapia as a substitution. Use whatever is fresh or least expensive. This feels like a lighter meal with the thin white fish and refreshing, always popular lemon flavor.
Adapted from: Food Network
Serves: 2-3
Ingredients:
3-4 small white fish fillets (such as tilapia or sole), about 1 pound total
Kosher salt and freshly ground black pepper
1/4 cup flour
1/2 teaspoon Paprika
2 lemons, juiced
2 Tablespoons capers
2 1/2 Tablespoons butter
2 Tablespoons chopped fresh parsley
Kosher salt and freshly ground black pepper
1/4 cup flour
1/2 teaspoon Paprika
2 lemons, juiced
2 Tablespoons capers
2 1/2 Tablespoons butter
2 Tablespoons chopped fresh parsley
Directions:
Thinly slice 1/2 of a lemon and reserve.
Combine flour and paprika on a small plate. Pat the fish dry and season with salt and pepper. Dredge in the flour, shaking off any excess.
Melt 1 1/2 Tablespoon of butter in a large skillet over medium-high heat. Saute the fish in the butter until just cooked through and light brown, about 2 minutes per side. Remove the fish from pan and transfer to plat.
Add the remaining 1 Tablespoon of butter to pan and stir until light brown and fragrant, scraping brown bits, about 1-2 minutes. Add lemon juice and capers and stir. Pour onto the fish and garnish with the chopped parsley and lemon slices.

Tuesday, May 14, 2013
Authentic Homemade Italian Dinner
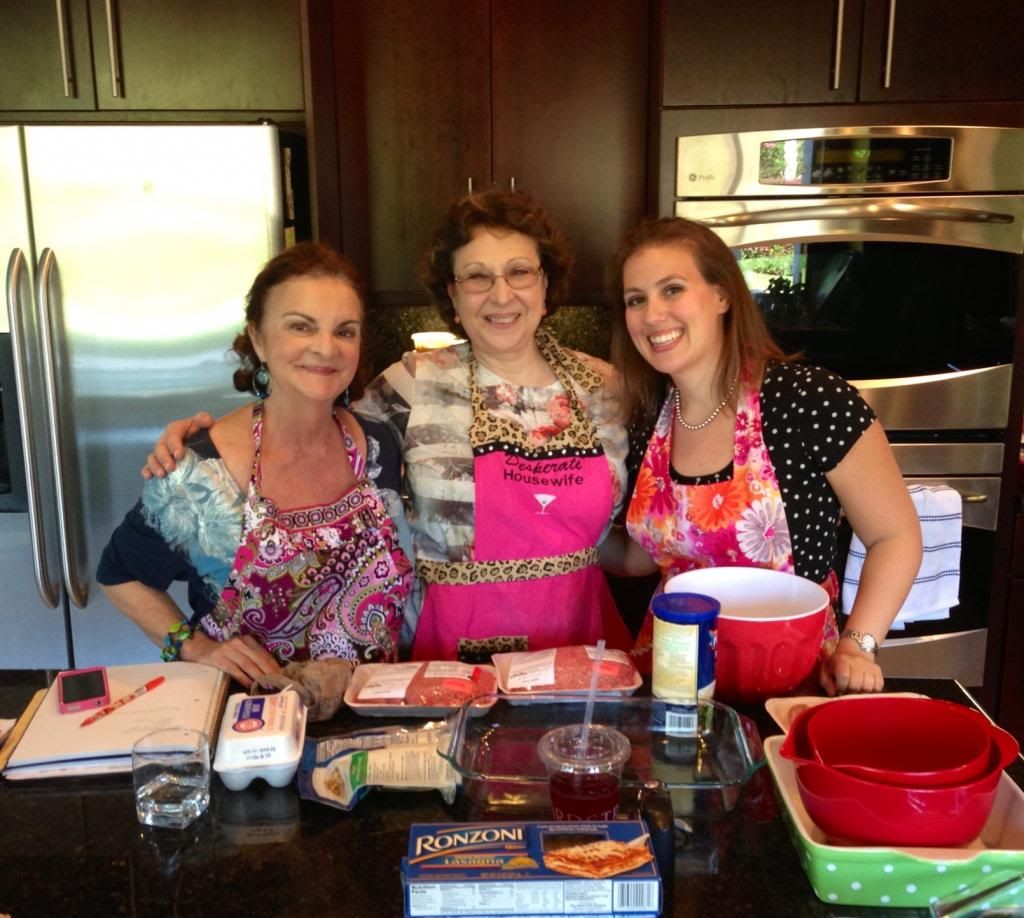
Jason's grandmother immigrated to this country from Italy. Growing up he was lucky enough to enjoy her authentic cooking. Unfortunately, I never had that luxury, but his aunts/cousins all learned from her in the kitchen. The last time his aunt was visiting I asked if she would come show me the family secrets. Not only was it fun to have his aunt and mother come over and cook in the kitchen, but created a fantastic Italian and family meal. Unfortunately, we were too busy chatting to take photos of the actual process and food, but there are some action shots.
First we started with the sauce, which was the base we cooked the meatballs in and used in the lasagna. As with most family recipes the seasoning was a little of this and a little of that, until it looks/tastes right.
Sauce:
(2) 28oz cans crushed tomatoes
12oz can tomato paste
basil
oregano
garlic powder
salt & pepper
Directions:
Pour the crushed tomatoes into a food mill and rinse with 1/2 can of water each over a pot. Mix through the mill and then discard the pulp that is left over. Add the paste into the pot and seasoning. Simmer over medium-low heat. If it seems too thick, add a little bit more water.
Meatballs:
Ingredients:
1.5 lbs ground beef
1/4 cup Pecorino Romano cheese
1 tsp Parsley
1 cup Italian bread crumbs
2 eggs
Directions:
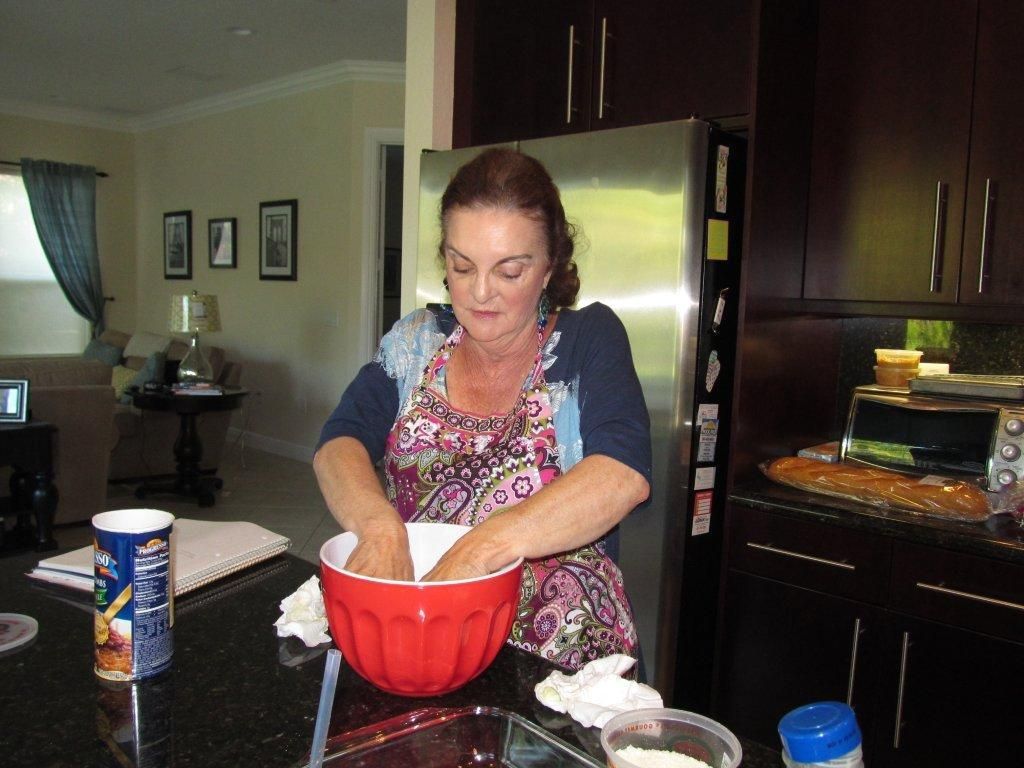
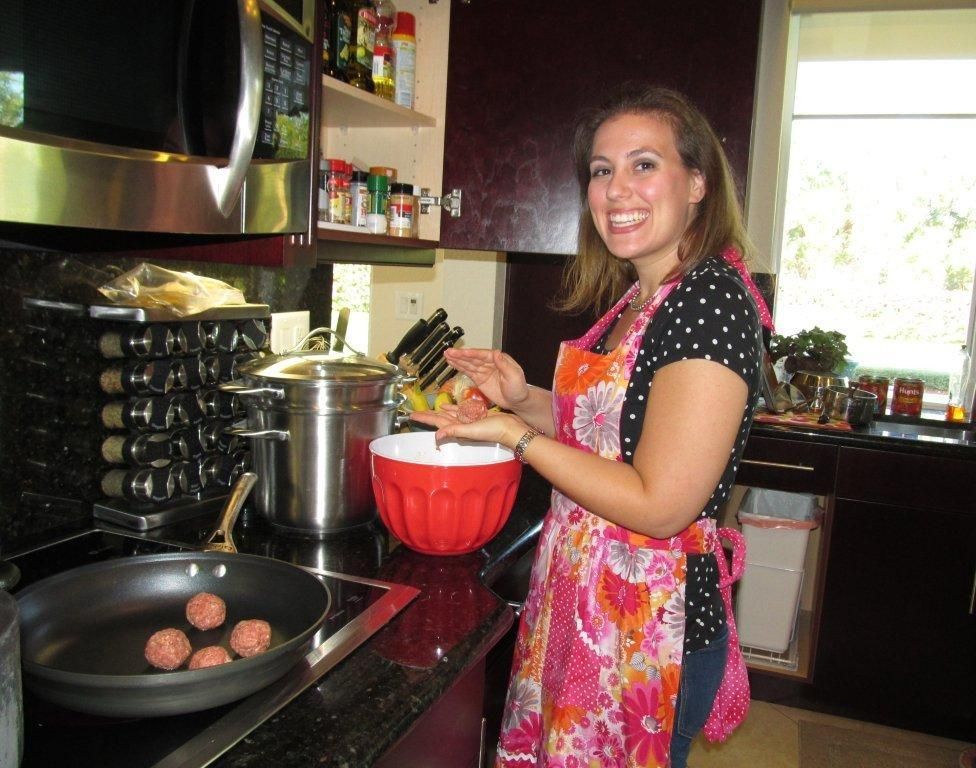
Pour all ingredients into a big bowl and mix together with your hands. Roll into walnut sized balls.
Heat a skillet over medium high heat and brown the meatballs on all sides to get a crust. Then put the meatballs into the red sauce to continue cooking and absorb the flavors.
Serve with the sauce over your favorite pasta.

Thursday, April 11, 2013
Skinny Spinach Stuffed Mushrooms
Normally when you go to a party the hors d'oeuvres are tasty yet usually not very good for you. Whenever I entertain I try to have some healthier versions of favorites so that the only healthy item isn't veggies and dip. The original recipe calls for bacon, but one of my friends is a vegetarian and since this was mainly a vegetable dish I omitted the bacon and didn't miss it at all. At less than 34 calories each, these were a huge hit and I wanted to just eat the leftover filling! If you don't want to make this as an appetizer you could stuff a large portobello mushroom for a meal or even a chicken breast. I made the stuffing ahead of time for less work while guests were over and then filled them right before baking.
Skinny Spinach Stuffed Mushrooms
Serves: 12-20
Source: Skinnytaste
Ingredients:
14oz (1 package) fresh mushrooms, stems separated
2 garlic cloves, sliced thin
4 cups fresh baby spinach
1 tsp olive oil
1/4 cup Italian seasoned bread crumbs
2 Tbsp shredded Parmesan cheese
Cooking spray
Directions:
Preheat the oven to 400F. Lightly spray a foil lined baking pan with cooking spray.
Remove stems from mushrooms and finely mince.
Heat a medium sized skillet. Rinse spinach and to the skillet; cook until it wilts, about 2 minutes. Remove from the pan, squeeze excess liquid and chop finely, set aside. (You can use frozen (defrosted) chopped spinach if you want to eliminate this step).
In a skillet, add olive oil and garlic, saute until golden, about 2 minutes. Add minced mushroom stems and saute until soft, about 2 minutes. Remove from the heat and combine mushroom stems with sauteed spinach, bread crumbs and parmesan cheese.
Season mushroom caps with salt. Fill mushrooms with spinach mixture, rounding tops off. Place on oven safe dish and lightly spray the tops with oil to turn golden brown. Bake 20 minutes or until golden. Eat warm.

Sunday, March 17, 2013
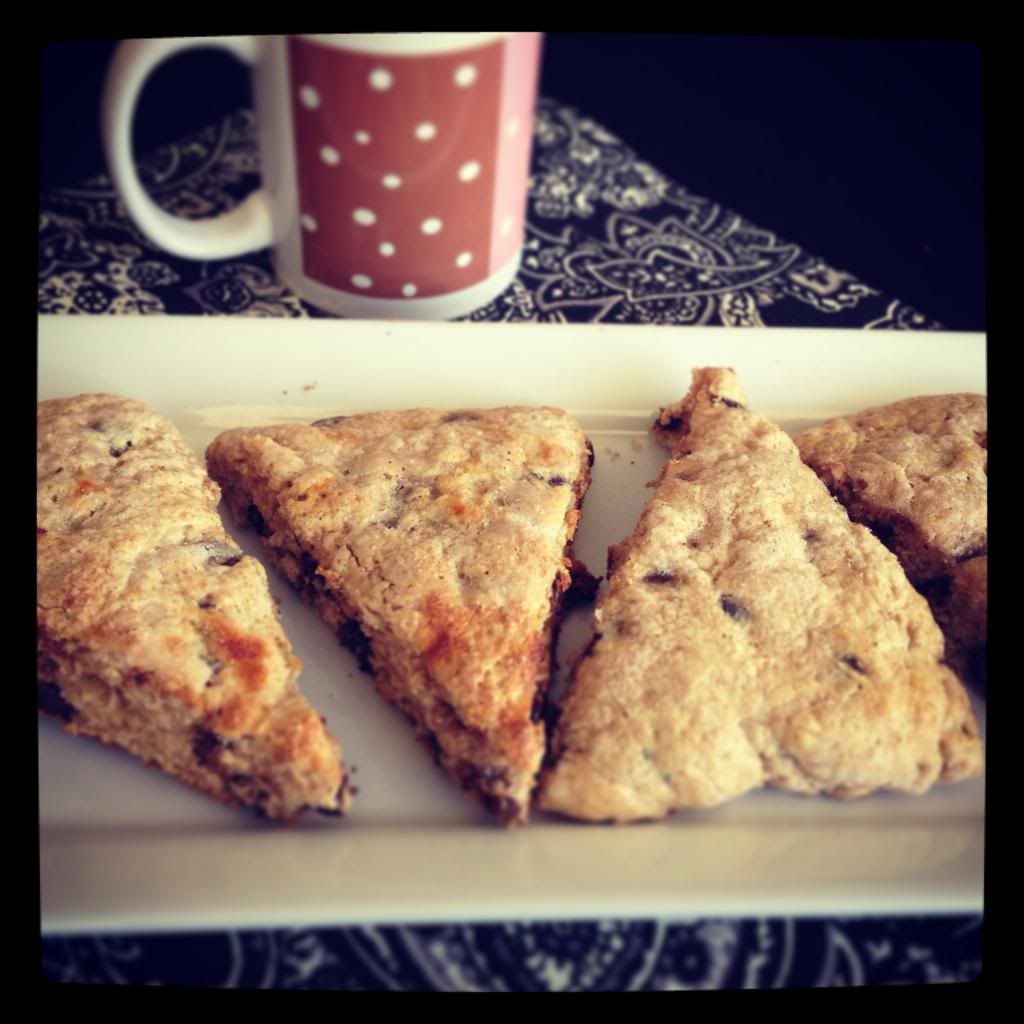
Chocolate Chip Buttermilk Scones
Happy Sunday and St. Patrick's Day! I always forget about the holiday until I leave my house and see everyone dressed in green. Needless to say, we didn't go out and celebrate. For some reason in my mind breakfast on the weekends can be indulgent. Maybe it is because you have the time to make something different and delicious, or maybe it's as a reward for the work week. These "skinny" chocolate chip buttermilk scones are that fix. Made with whole wheat flour it gives them a little bit nuttier and denser flavor and texture but are delicious. And being under 200 calories makes it so you can feel indulgent without feeling guilty. I made these for some company that came over for coffee since I couldn't just serve a beverage without any food!
Chocolate Chip Buttermilk Scones
Yields: 12
Source: Skinnytaste
Ingredients:
3/4 cup cold buttermilk (lowfat if possible)
1/4 cup sugar
2 tsp vanilla extract
1 large egg
1 cup all purpose flour
1 cup white whole wheat flour
1 Tbsp baking powder
1/2 tsp salt
3 Tbsp chilled butter (must be cold) cut into small pieces
3/4 cup chocolate chips
cooking spray
1 large egg white, lightly beaten
1 Tbsp sugar
Directions:
Preheat oven to 375°. Combine the first four ingredients in a medium bowl, stirring with a whisk. Spray baking sheet with cooking spray.
Combine flour, baking powder, salt, in a large bowl, stirring with a whisk. Cut in chilled butter with a pastry blender, or you could use 2 knives, until the mixture resembles coarse meal. Gently fold in chocolate chips. Add milk mixture, stirring just until moist.
Place dough onto a floured surface and knead lightly four times with floured hands. Form dough into an 9-inch circle onto baking sheet, about 3/4" thick. Using a knife, cut dough into 12 wedges all the way through.
Brush egg white over dough and sprinkle evenly with sugar. Bake until golden, about 18-20 minutes, depending on your oven. Serve warm.
Nutritional Information:
Calories: 199.6 • Fat: 8.1g • Protein: 3.7g • Carb: 29.8g • Fiber: 2.3g • Sugar: 12g
Sodium: 257.4mg

Sunday, March 10, 2013
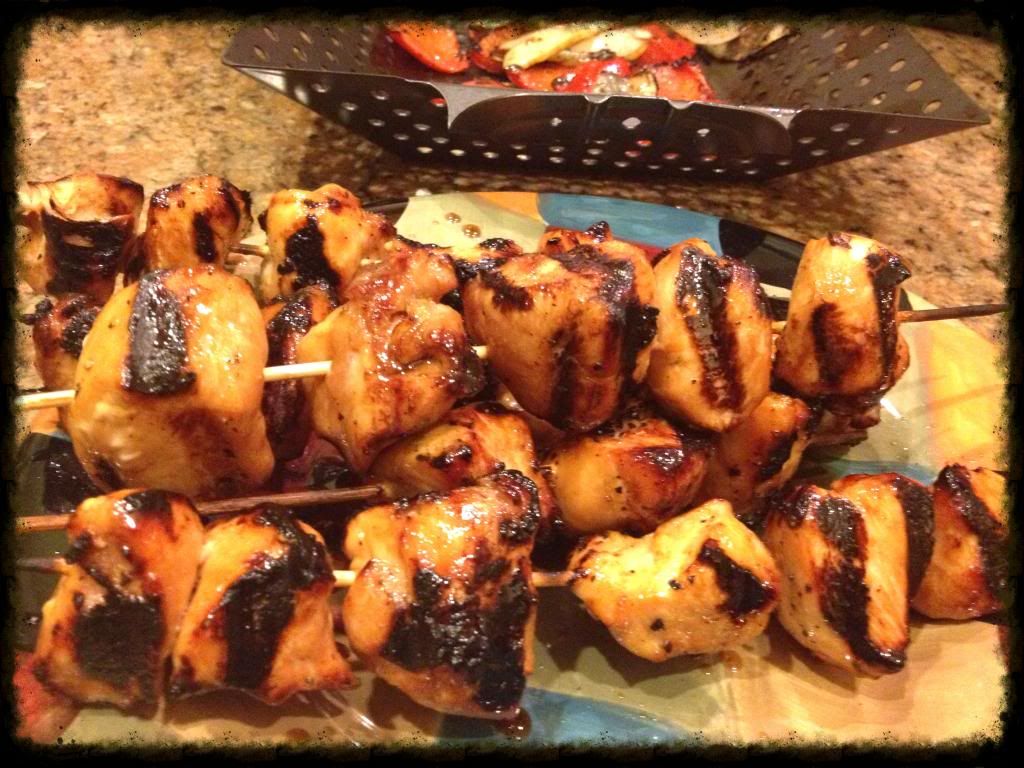
Honey Chicken Kabobs
One thing I love about living in Florida is that it is always grilling weather. And grilling is such a quick, easy and usually healthy way to make dinner. These Honey Chicken Kabobs were a huge hit with us! We made them to take over to Jason's parents house for an easy and transportable dinner. I let the chicken and vegetables marinate about 4-5 hours to ensure they soaked up the marinade. By brushing the reserved marinade on top it sealed in the flavor. The chicken is a little sweet from the honey and tangy from the soy sauce. The best part is that they are only 180 Calories! You can use whatever vegetables you prefer or have in the house.
Honey Chicken Kabobs
Source: All Recipes
Serves: 12
Ingredients:
1/4 cup vegetable oil
1/3 cup honey
1/3 cup low sodium soy sauce
1/4 teaspoon fresh ground black pepper
8 skinless, boneless chicken breasts, cut into 1-2 inch cubes
2 cloves of garlic
1 onion, cut into 2 inch pieces
2 red bell peppers, cut into 2 inch pieces
Directions:
In a large bowl, whisk together oil, honey, soy sauce, and pepper. Before adding chicken, reserve a small amount of marinade to brush onto kabobs while cooking. Place the chicken, garlic, onions and peppers in the bowl, and marinate in the refrigerator at least 2 hours (the longer the better). 30 minutes before you are ready to start, soak the skewers in water so they won't burn on the grill.
Preheat the grill for high heat.
Drain marinade from the chicken and vegetables, and discard marinade. Thread chicken and vegetables alternately onto the skewers.
Lightly oil the grill grate. Place the skewers on the grill. Cook for 12 to 15 minutes, until chicken juices run clear. Turn and brush with reserved marinade frequently.

Thursday, March 7, 2013
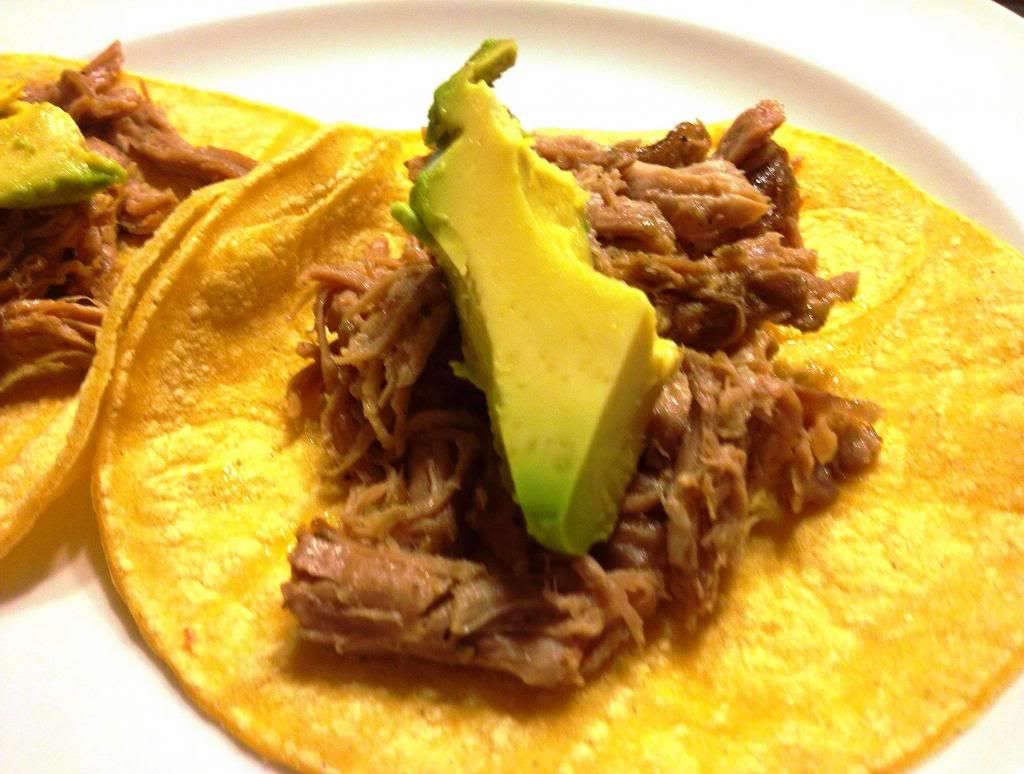
Slow Cooked Pork Carnitas
Mexican is up there with one of my favorite types of food to eat. And like most people I am a sucker for Chipotle, even though it is awful for you. This is a spin on their pork carnitas that we made into tacos. It is packed full of flavor and can be made spicier or more mild depending on how many peppers and how much seasoning you add. I had never used adobo seasoning before, which comes from the Spanish word meaning "to marinate" and is rich in flavor and spice but not hot. This recipe was definitely a keeper, but it does require you to brown the meat before putting it in the crock pot, something I normally feel defeats the purpose of the ease of a crock pot recipe, but in this case took about 10 minutes and adds more flavor so don't skip the step.
Slow Cooked Pork Carnitas (Mexican Pulled Pork)
Source: Skinnytaste
Servings: 8 • Serving Size: 4 oz (1/2 cup)
Calories: 176 • Fat: 7.7g Protein: 25.8 g Carb: 1.3 g Fiber: 0.1 g
4 cloves garlic, cut into sliver
1 tsp cumin
dry adobo seasoning (I used Goya)
1 tsp powder
3/4 cup 99% fat free chicken broth
2-3 chipotle peppers in adobo sauce (to taste)
2 bay leaves
Directions:
Season pork with salt and pepper. In a medium sauté pan on medium-high heat, brown pork on all sides for about 10 minutes. Remove from heat and allow to cool.
Using a sharp knife, insert blade into pork, cutting small holes and insert garlic slivers. Season pork generously with cumin, adobo and garlic powder all over.
Pour chicken broth in the crock-pot, add bay leaves and chipotle peppers. Place pork in crock pot and cover. Cook low for 8 hours. After 8 hours, shred pork using two forks and combine well with the juices that accumulated at the bottom. Remove bay leaves and adjust salt and cumin (you will probably need to add more). Let it cook another 15-30 minutes.
Slow Cooked Pork Carnitas (Mexican Pulled Pork)
Source: Skinnytaste
Servings: 8 • Serving Size: 4 oz (1/2 cup)
Calories: 176 • Fat: 7.7g Protein: 25.8 g Carb: 1.3 g Fiber: 0.1 g
Ingredients:
2.5 lb pork shoulder blade roast, lean, all fat removed4 cloves garlic, cut into sliver
1 tsp cumin
dry adobo
1 tsp powder
3/4 cup 99% fat free chicken broth
2-3 chipotle peppers in adobo sauce (to taste)
2 bay leaves
Directions:
Season pork with salt and pepper. In a medium sauté pan on medium-high heat, brown pork on all sides for about 10 minutes. Remove from heat and allow to cool.
Using a sharp knife, insert blade into pork, cutting small holes and insert garlic slivers. Season pork generously with cumin, adobo
Pour chicken broth in the crock-pot, add bay leaves and chipotle peppers. Place pork in crock pot and cover. Cook low for 8 hours. After 8 hours, shred pork using two forks and combine well with the juices that accumulated at the bottom. Remove bay leaves and adjust salt and cumin (you will probably need to add more). Let it cook another 15-30 minutes.

Monday, March 4, 2013
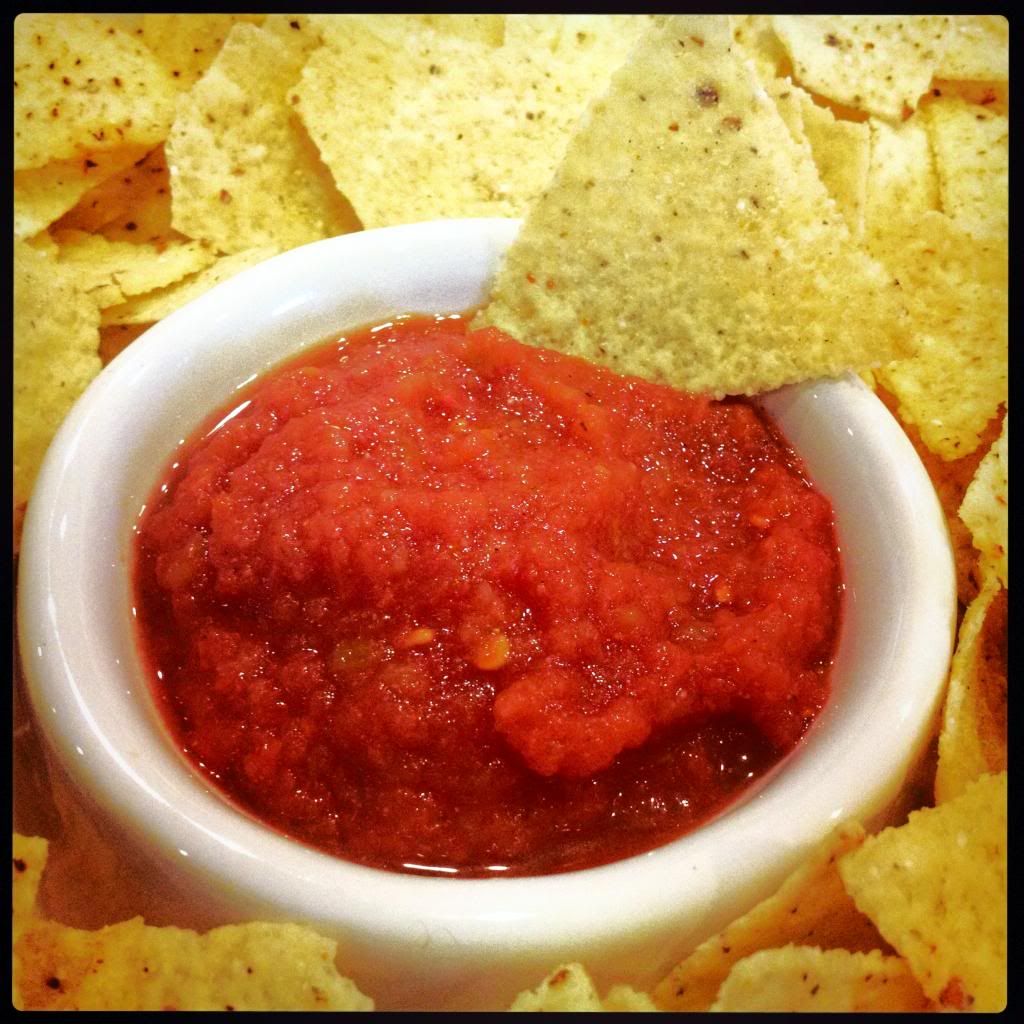
Chili's Copycat Salsa
Happy Monday! One go to food to have out if guest come over is always chips and salsa. It is easy, tasty and pretty much everyone likes it. I kept seeing recipes for a copycat version of the delicious blended salsa you get at Chili's, which is definitely one of the perks to eating there. Since this makes a lot I first made some for a Mexican night with some friends. They had recently eaten at Chili's and said it tasted exactly the same, it was like music to my ears. And even if it hadn't tasted exactly the same it was still pretty good. My husband and I are not big tomato fans so this version that is mixed in the food processor (or blender) is much better than other fresh salsas that have chunks of the ingredients.
Chili's Copycat Salsa
Source: Six Sister's Stuff
Ingredients:
Chili's Copycat Salsa
Source: Six Sister's Stuff
Ingredients:
2 cans (14.5 oz each) whole tomatoes, drained
3-4 canned, whole jalapenos (not pickled)
1 yellow onion, quartered
1 teaspoon garlic salt
1/2 teaspoon salt
1 teaspoon cumin
1/2 teaspoon sugar
2 teaspoons lime juice
Directions:
Place all of the ingredients together into a food processor or blender and puree until smooth. Serve with tortilla chips.
1 yellow onion, quartered
1 teaspoon garlic salt
1/2 teaspoon salt
1 teaspoon cumin
1/2 teaspoon sugar
2 teaspoons lime juice
Directions:
Place all of the ingredients together into a food processor or blender and puree until smooth. Serve with tortilla chips.

Thursday, February 28, 2013
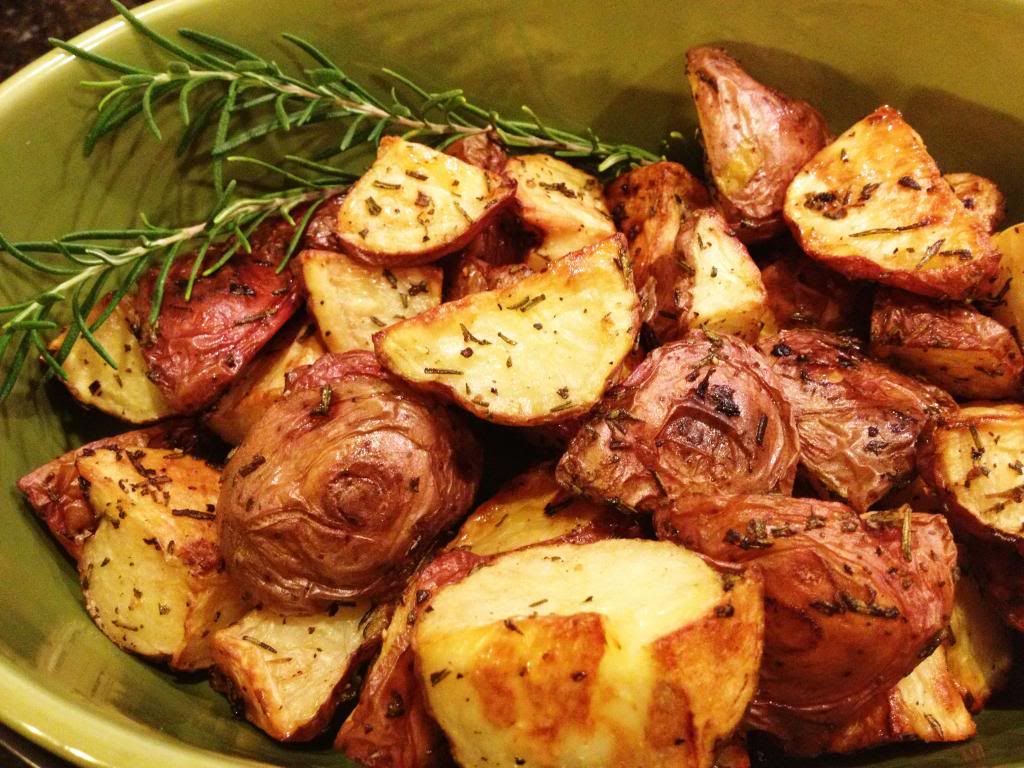
Rosemary Roasted Potatoes
Let's be honest, who doesn't love potatoes?! They are easily one of my favorite side dishes; so versatile and always delicious. Roasted potatoes are one of the easiest things to cook and makes a meal look and feel fancier for some reason. We have a huge rosemary bush in our backyard so I am a fan of any excuse to use it, plus it's one less ingredient to buy at the store. I made them as a side to Roasted Chicken with Rosemary and Lemon for family dinner, but are a perfect side dish for any meal. I hope you enjoy them as much as we do.
Rosemary Roasted Potatoes
Serves: 3-4
Source: Barefoot Contessa
Ingredients:
1 1/2 pounds small red or white-skinned potatoes (or a mixture)
1/8 cup good olive oil
3/4 teaspoon kosher salt
1/2 teaspoon freshly ground black pepper
1 Tablespoons minced garlic (3 cloves)
2 Tablespoons minced fresh rosemary leaves
Directions:
Preheat the oven to 400 degrees F.
Cut the potatoes in half or quarters and place in a bowl with the olive oil, salt, pepper, garlic and rosemary; toss until the potatoes are well coated. Dump the potatoes on a baking sheet and spread out into 1 layer; roast in the oven for at least 1 hour, or until browned and crisp. Flip twice with a spatula during cooking to ensure even browning.
Remove the potatoes from the oven, season to taste, and serve.

Friday, February 22, 2013
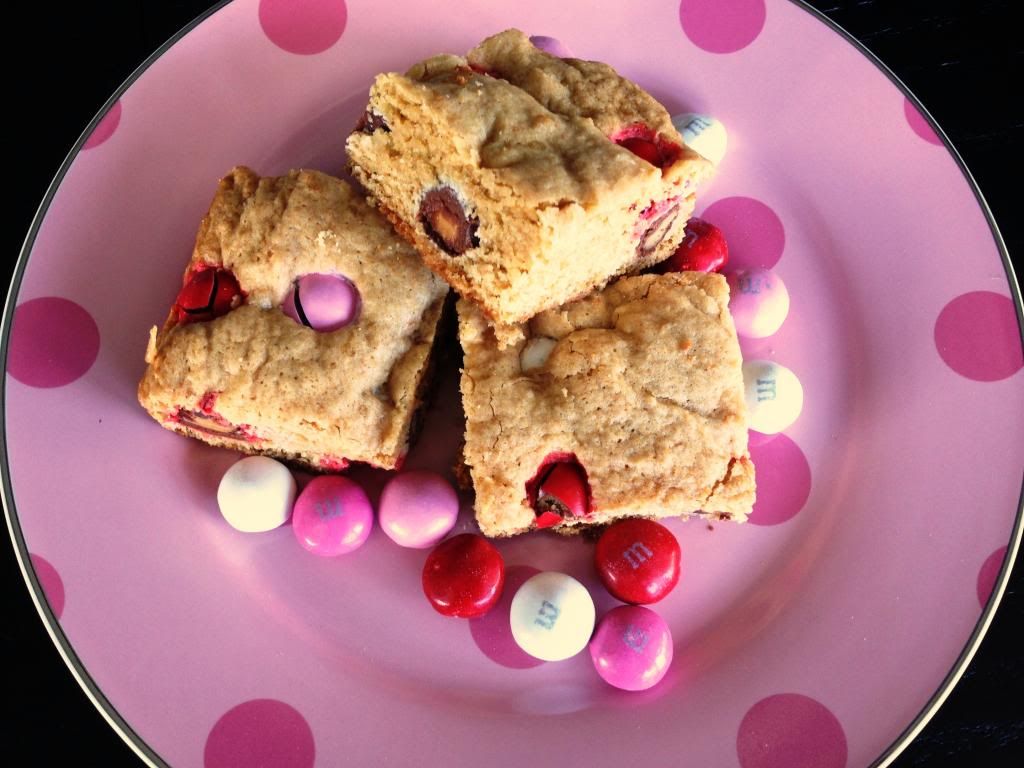
Thick and Chewy M&M Cookie Bars
I am guilty of being suckered in by the holiday clearance section. I just can't resist a good deal, especially on chocolate! Since I would be tempted having an entire bag of delicious peanut butter m&m's in the house I made these thick, chewy yet not dense m&m bars. The original recipe called for plain m&m's but the peanut butter ones made them even better in my opinion, but use whichever flavor you prefer. I tried to cut them into smaller pieces to share with my book club but you can make larger pieces like they do in bakeries. These definitely did not last too long, the peanut butter is addicting!
Thick and Chewy M&M Cookie Bars
Yields: 28
Source: What Megan's Making
Ingredients:
2 1/8 cups flour
Thick and Chewy M&M Cookie Bars
Yields: 28
Source: What Megan's Making
Ingredients:
2 1/8 cups flour
1/2 tsp salt
1/2 tsp baking soda
8 Tbsp butter (1 stick), melted and cooled slightly
4 Tbsp applesauce (substituted for additional butter
1 cup brown sugar
1/2 cup white sugar
1 large egg
1 large egg yolk
2 tsps vanilla extract
12oz bag M&M's, divided
Directions:1/2 tsp baking soda
8 Tbsp butter (1 stick), melted and cooled slightly
4 Tbsp applesauce (substituted for additional butter
1 cup brown sugar
1/2 cup white sugar
1 large egg
1 large egg yolk
2 tsps vanilla extract
12oz bag M&M's, divided
Preheat the oven to 325 degrees. Adjust the oven rack to lower-middle position. Line a 9x13 pan with foil and spray with PAM for easy removal; set aside.
In a medium sized bowl, whisk together the flour, salt, and baking soda and set aside.
In a large bowl, whisk the melted butter, applesauce and sugars until combined. Add the egg, egg yolk, and vanilla and mix well. Using a rubber spatula, fold the dry ingredients into the egg mixture until just combined; do not overmix. Fold in 1 cup of M&M's and turn the batter into the prepared pan, smoothing the top with the spatula. Sprinkle remaining M&M's on top and press in slightly.
Bake 25-30 minutes, until the top of the bars is light golden brown, slightly firm to the touch, and edges start pulling away from sides of pan. Cool completely before cutting.

Tuesday, February 19, 2013
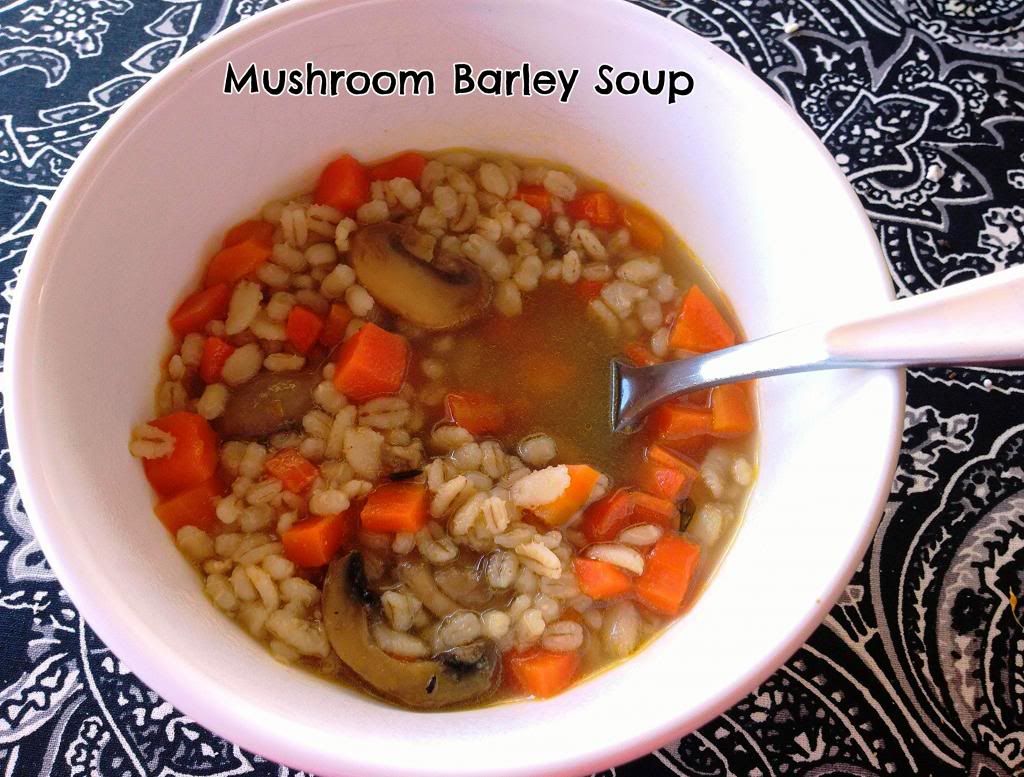
Mushroom Barley Soup
This weekend it was cold here and not just Florida cold, we actually had a frost warning! I know it is nothing to complain about compared to the snow and serious cold weather all over. It is actually nice to have a larger change in temperature and have a glimpse of winter. And of course can use the opportunity to make some hearty and healthy soup before it gets warm again.
Most of the soups out there can be filled with so much sodium! However, soup can actually be an extremely healthy meal and not hard to make. When possible it is something I like to make a big batch of since it freezes well for another chilly day. The original recipe says it serves 4 people but I think this made a ton! Make sure to cook the barley all the way so it isn't chewy. The barley has a nutty flavor that compliments the mushrooms earthiness. Barley is a great source of fiber, so one bowl will fill you up while also warming you up!
Mushroom Barley Soup
Serves: 4-6
Source: Real Simple Magazine
Ingredients:
2 Tablespoons olive oil
1 pound mushrooms, sliced
4 cups carrots, chopped
2 sprigs fresh thyme
kosher salt and black pepper
6 cups low-sodium vegetable broth
¾ cup pearl barley
1 Tablespoon chopped flat-leaf parsley (optional)
Directions:
1. Heat the oil in a large pot over medium-high heat. Add the
mushrooms, carrots, garlic, thyme, and ¾ teaspoon each salt and pepper. Cook,
stirring occasionally, until the carrots are tender, 8 to 10 minutes.
2. Add the vegetable broth and barley. Simmer, partially covered,
until the barley is tender, 30 to 35 minutes. Top with the chopped flat-leaf
parsley before serving.
Nutritional Information:
Calories 269; Fat 8g; Sat Fat 1g; Cholesterol 0mg; Sodium 622mg; Protein 8g; Carbohydrate 44g; Sugar 8g; Fiber 11g; Iron 3mg; Calcium 75mg
Friday, February 15, 2013
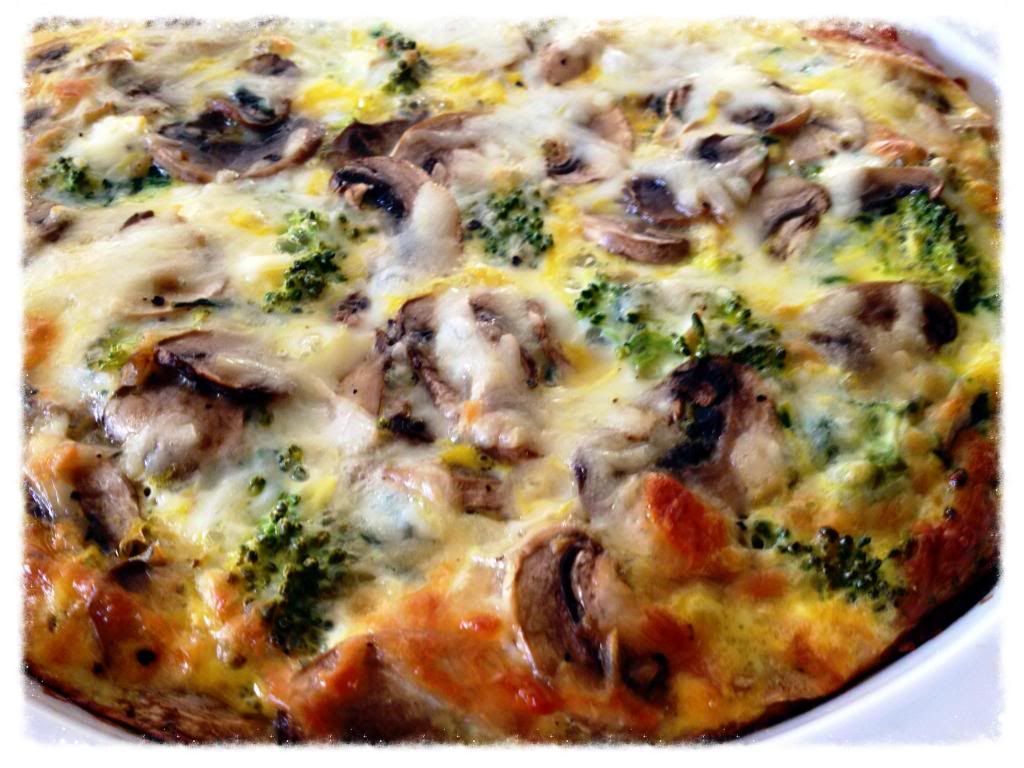
Spinach, Mushroom & Feta Crustless Quiche
My brother and his girlfriend came to visit last weekend, and it was so great to see them and spend some time together! Of course they loved escaping the snow storm back north for the warm weather here. Whenever we have people visit we are reminded of the vacation like state we live in and take for granted. Visitors remind us to take a moment from our busy lives to sit by the pool or in the yard and just enjoy the weather.
![Spinach, Mushroom & Feta Crustless Quiche]() Another reason I enjoy company is because it gives me the perfect excuse to try out some new breakfast recipes, especially this crust-less quiche. I don't normally make frittatas or quiches because the two of us don't finish them and let's be honest I don't fuss that much in the morning. I try to only make ones that you don't have to partially cook or let set BEFORE going in the oven. The beauty of this recipe is that you only have to saute the mushrooms and then everything else is mixed up and put directly in the dish and you can forget about it while you shower, or in their case play in the pool. I also added in a bit of leftover broccoli with the spinach, so feel free to add that or any other vegetables you want to use up.
Another reason I enjoy company is because it gives me the perfect excuse to try out some new breakfast recipes, especially this crust-less quiche. I don't normally make frittatas or quiches because the two of us don't finish them and let's be honest I don't fuss that much in the morning. I try to only make ones that you don't have to partially cook or let set BEFORE going in the oven. The beauty of this recipe is that you only have to saute the mushrooms and then everything else is mixed up and put directly in the dish and you can forget about it while you shower, or in their case play in the pool. I also added in a bit of leftover broccoli with the spinach, so feel free to add that or any other vegetables you want to use up.
Spinach, Mushroom & Feta Crustless Quiche
Serves: 6
Source: The Prairie Kitchen
Ingredients:
10 ounces, weight Frozen chopped spinach (defrosted and drained)
8 ounces fresh mushrooms, sliced
1/2 tsp garlic, minced
2 ounces Feta cheese, crumbled
non-stick cooking spray
1/8 cup Parmesan cheese, freshly grated
5 large eggs
8 ounces skim milk
1/4 cup Mozzarella cheese, shredded
salt & pepper to taste
Directions:
Preheat your oven to 350 degrees. If your frozen spinach is not already thawed, thaw it in the microwave. Empty the box into a colander and let it drain while you begin to prepare the rest.
Quickly rinse the mushrooms and slice them thinly. Place the sliced mushrooms in a skillet coated with non-stick spray, add the minced garlic, and sprinkle a little salt and pepper. Turn the heat on to medium-high and saute the mushrooms until they release all of their moisture and no more water remains on the bottom of the skillet (5-7 minutes)
Spray a pie dish with non-stick spray. Squeeze the rest of the water out of the spinach and spread it out on the bottom of the pie dish. Next add the cooked mushrooms and crumbled feta.
In a medium bowl whisk together the eggs until fairly smooth. Add the milk, Parmesan and another small sprinkle of pepper. Whisk to combine. (This step can be completed while the mushrooms are cooking) Pour this mixture into the pie dish over the spinach, mushrooms, and feta.
Sprinkle the shredded mozzarella cheese over top. Place the pie dish on a baking sheet for easy transfer into the oven. Place the quiche into the preheated oven and bake until it is golden brown on top and the center is solid. Every oven is different but this should take between 45 minutes. Let it cool 5-10 minutes then slice and serve!

Monday, February 11, 2013
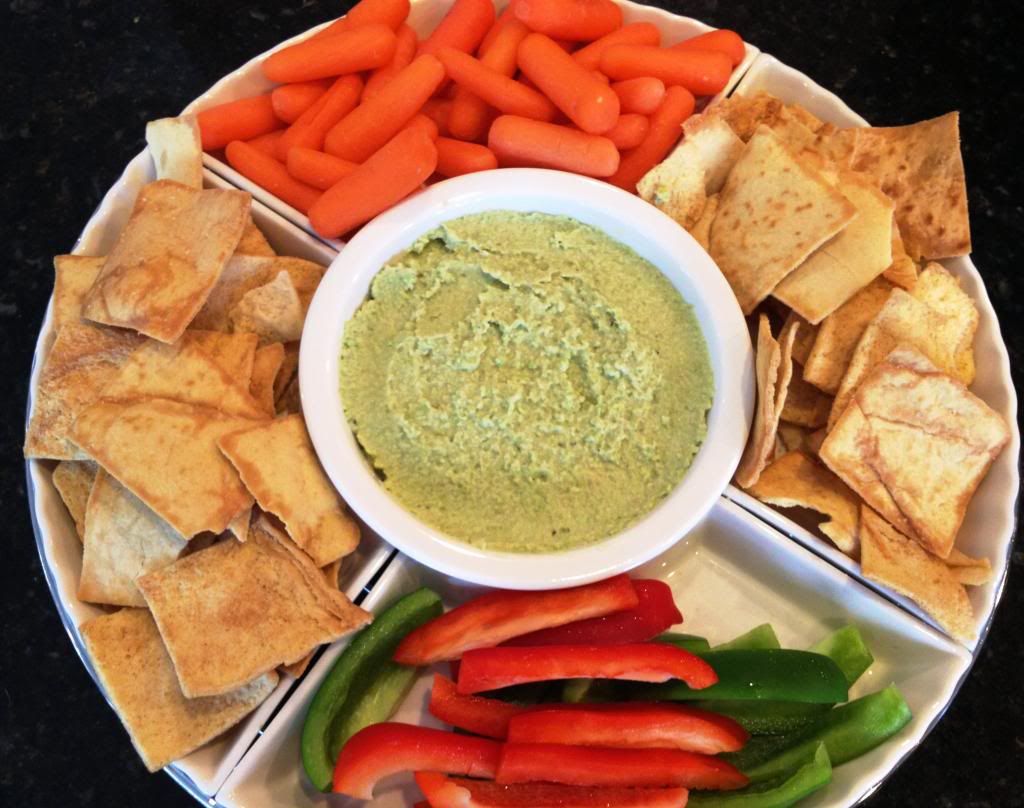
White Bean and Edamame Hummus
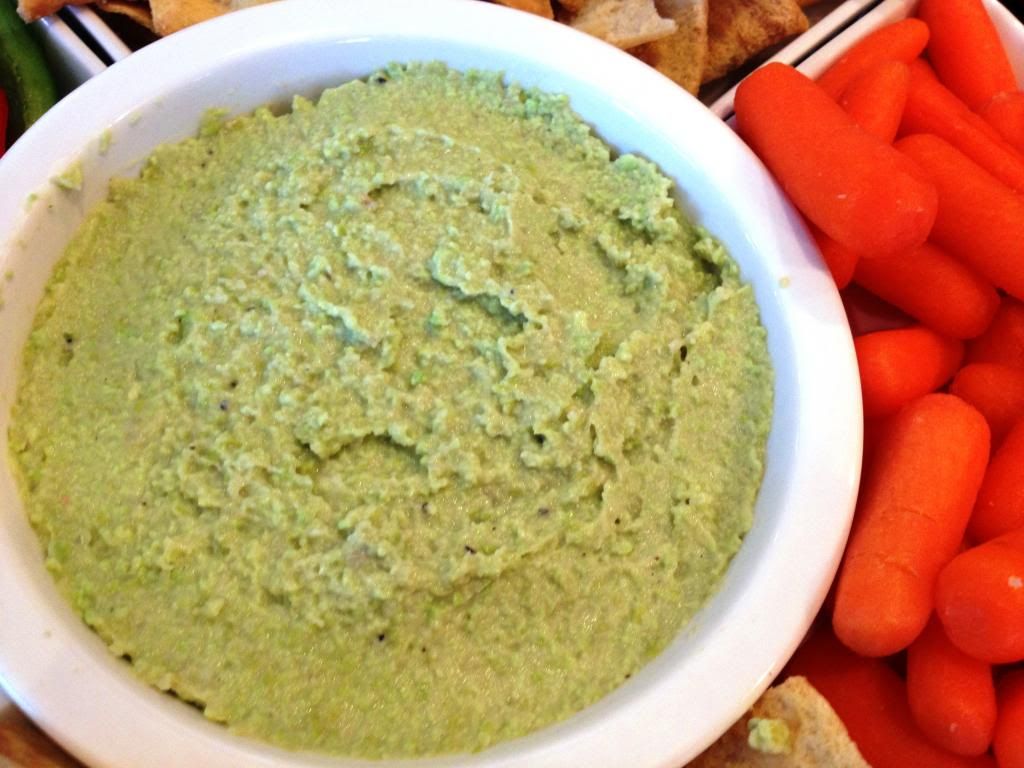
Happy Monday! How is it that the weekends always go by way too quickly?! Here is a great twist on a healthy snack or snack to start your week off right. Who doesn't love traditional hummus...expand your horizons with a different version. I had bought some frozen shelled edamame a while ago and needed a reason to use them. This Asian-inspired recipe uses cannellini beans and edamame instead of traditional garbanzo beans/chick peas, and sesame oil instead of tahini, giving the green dip a nutty, toasty flavor. The garlic and sesame oil can be a bit overpowering so start with a small amount and you can always add more.
Transfer to a medium bowl, add the cilantro, and stir to combine. Taste and season with more salt or lemon juice as needed. Serve with chips or veggies.
Ingredients:
1 (15-ounce) can cannellini beans, drained and rinsed
1 1/2 cups shelled, cooked edamame, thawed if frozen
1 medium garlic gloves, coarsely chopped
1/4 cup water, plus more as needed
3 Tablespoons freshly squeezed lemon juice (from about 2 medium lemons), plus more as needed
2 Tablespoons olive oil
1 teaspoon kosher salt, plus more as needed
1/4 teaspoon toasted sesame oil
Freshly ground black pepper
2 Tablespoons coarsely chopped fresh cilantro (optional)
Directions:
Place the cannellini beans, edamame, garlic, water, lemon juice, olive oil, salt, and sesame seed oil in a food processor fitted with a blade attachment. Season with pepper and process until smooth, scraping down the sides of the bowl as needed. If the dip is too thick, pulse in more water, a tablespoon at a time, until the desired consistency is reached.
Transfer to a medium bowl, add the cilantro, and stir to combine. Taste and season with more salt or lemon juice as needed. Serve with chips or veggies.

Sunday, February 3, 2013
Easy scratch brownies
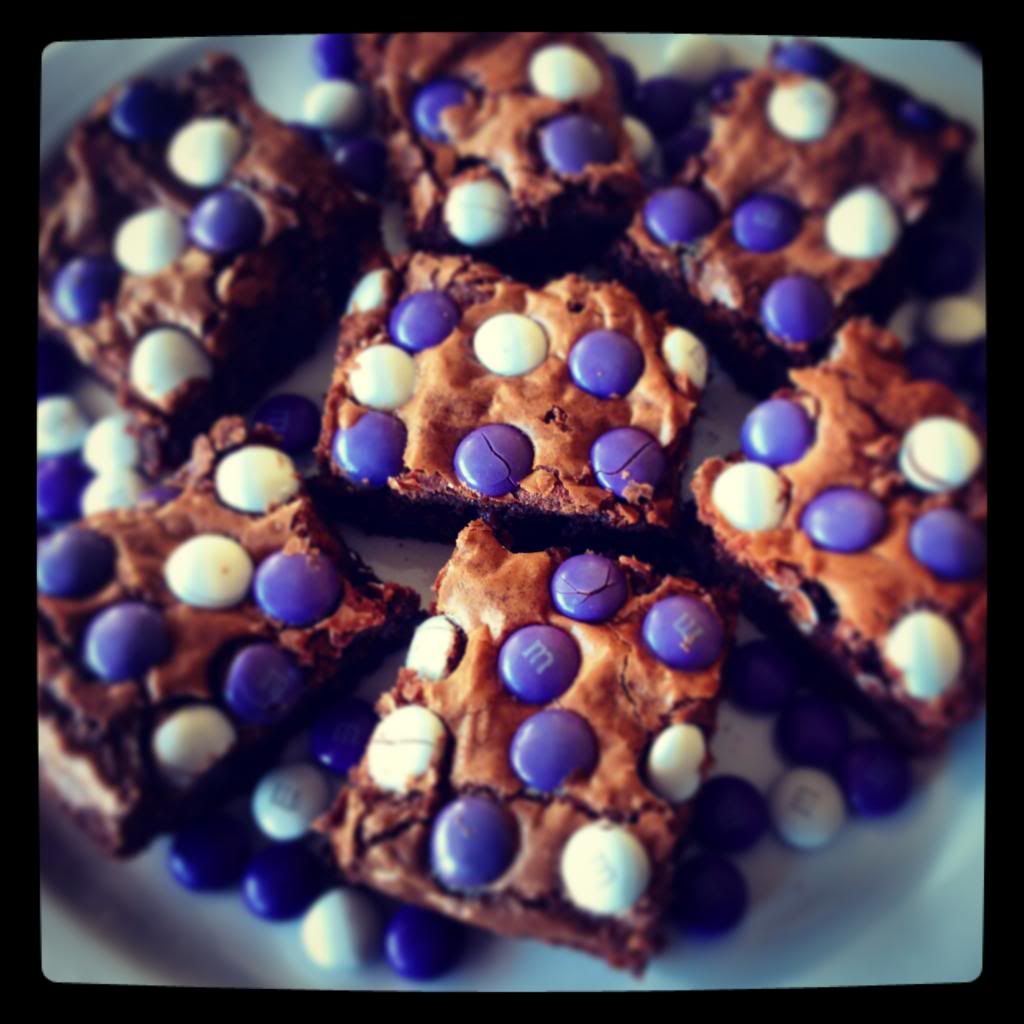
As everyone knows I love pretty much everything chocolate and brownies are no exception. However, brownies are one thing I can't seem to master. This is an easy no fail recipe that has worked every time I have made it. I enjoy the bittersweet chocolate, but my husband prefers the semi-sweet. You can always adjust the ratio of dark to semi sweet chocolate for your preference. I made one batch with all 60% cocoa and another batch that was half semi-sweet and half 60% and was just as tasty. I was having a friend over to watch the Super Bowl and this was a great go to recipe. To make them a little special for the Super Bowl and our old "home" team the Ravens, I sprinkled purple and white m&m's on top. You can make them plain or add m&m's in any holiday colors.
Easy Brownies
Yields: 12-16
Source: Chow
Ingredients:6 ounces bittersweet chocolate chips (about 1 cup) or coarsely chopped bittersweet chocolate
8 Tablespoons unsalted butter (1 stick), cut into 8 pieces
2 large eggs, at room temperature
1 cup granulated sugar
1 teaspoon vanilla extract
1/2 teaspoon baking powder
1/4 teaspoon fine salt
1 cup all-purpose flour
Directions:
Heat the oven to 350°F and arrange a rack in the middle. Line an 8-by-8-inch metal baking pan with aluminum foil.
Combine the chocolate and butter in a medium saucepan and cook over low heat, stirring frequently, until melted and smooth. Remove from the heat and let cool slightly, about 5 minutes. (Alternatively, melt the chocolate and butter in the microwave, stirring every 30 seconds.)
Combine the eggs, sugar, vanilla, baking powder, and salt in a large bowl and stir with a rubber spatula until just evenly incorporated. Add the chocolate mixture and stir until evenly combined. Add the flour and fold in until just incorporated, about 20 strokes (no white streaks should remain).
Pour the batter into the prepared pan, push it to the edges in an even layer, and smooth the top. Bake until a cake tester or skewer inserted into the center comes out clean, about 25 minutes. Remove to a wire rack and let the brownies cool for at least 20 minutes.
To remove the brownies, grip the excess foil and pull it out of the baking pan. Transfer to a cutting board and cut the brownies into 2-inch squares.

Wednesday, January 30, 2013
Grilled Pesto Shrimp
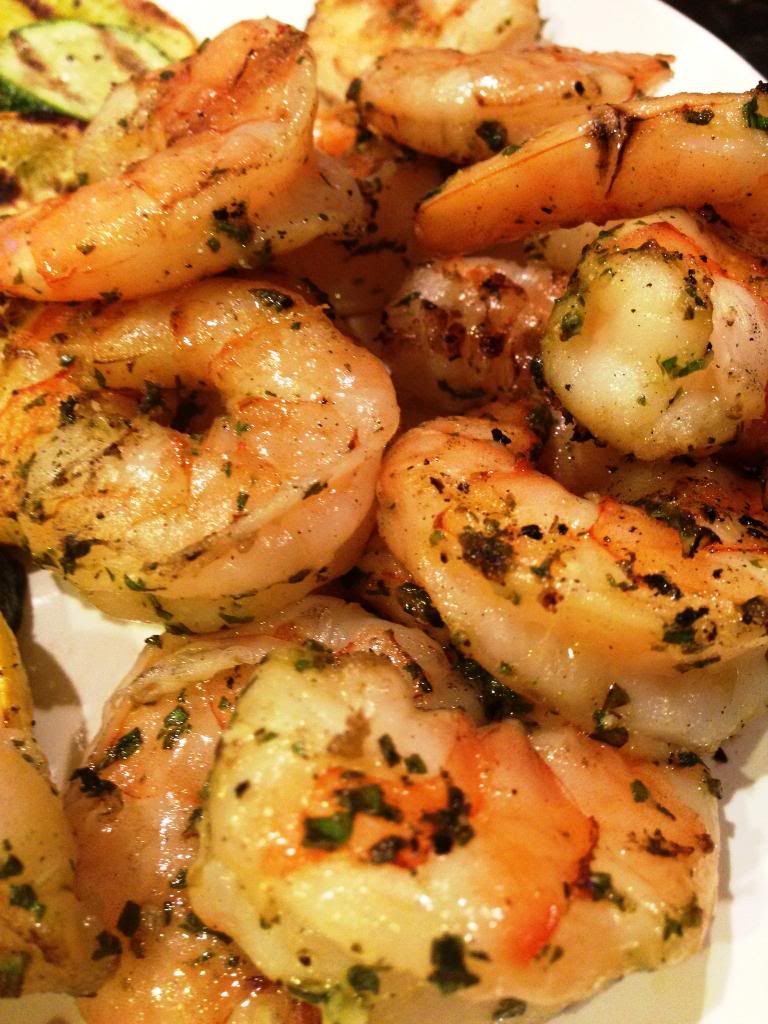
We pretty much always have a bag of frozen shrimp in our freezer and therefore are always trying new shrimp dishes. Normally fresh basil and the grill are reserved for the summer, but not in Florida! It was a great way to kick off our year with a healthy, fresh and quick dinner and allows us to use some of the ever growing basil in our yard. Try this at your next BBQ and it is guaranteed to be a hit. Normally, basil can be heavy on the garlic, but not this one, the shrimp have a fresh flavor from the basil. You can also serve it as a healthy appetizer for the Superbowl!
Grilled Pesto Shrimp
Serves 6
Source: Skinnytaste
Ingredients:
1 cup fresh basil leaves, chopped
1 clove garlic
1/4 cup grated Parmigiano Reggiano
3 Tbsp olive oil
1 1/2 lbs jumbo shrimp, peeled and deveined
kosher salt
fresh ground pepper
wooden skewers, soaked in water
Directions:
In a food processor pulse basil, garlic, parmesan cheese, salt and pepper until smooth. Slowly add the olive oil while pulsing.
Combine raw shrimp with pesto and marinate a few hours in a bowl, covered in the fridge. Soak wooden skewers in water at least 20 minutes (or use metal ones to avoid this step. Thread shrimp onto skewers.
Heat grill or grill pan over medium-low heat until hot. Be sure grates are clean and spray lightly with oil. Place shrimp on the hot grill and cook until shrimp turns pink on the bottom, about 3-4 minutes; turn and continue cooking until shrimp are opaque and cooked through, about 3-4 minutes.

Subscribe to:
Posts (Atom)
