Thursday, February 28, 2013

Rosemary Roasted Potatoes

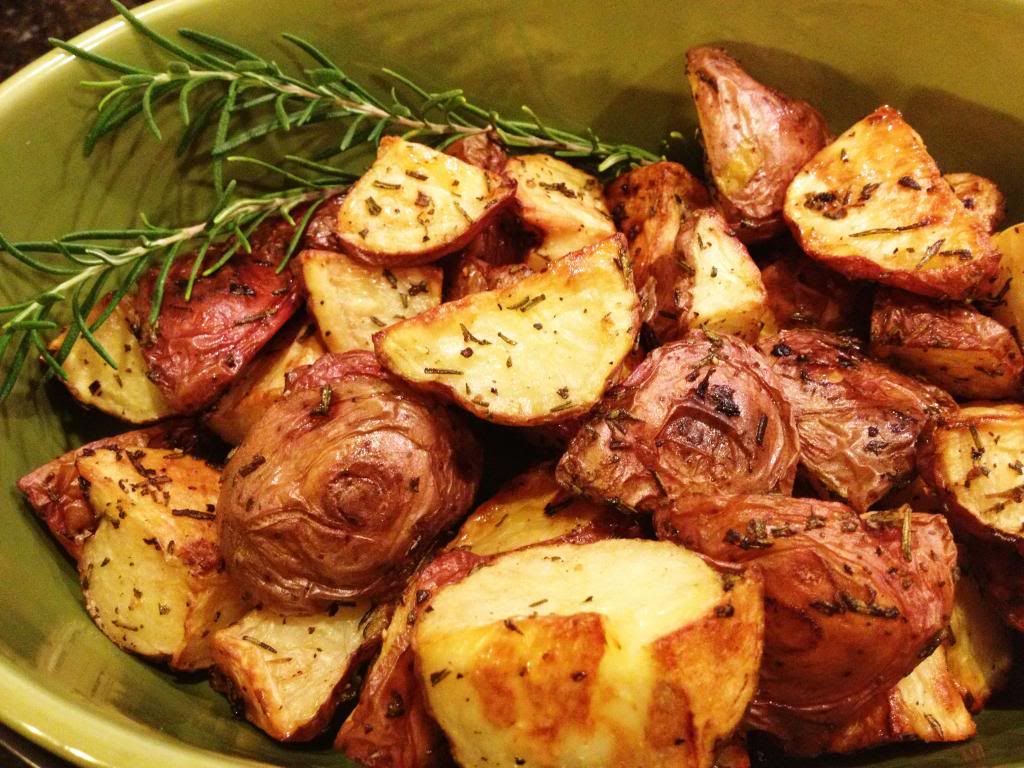
Let's be honest, who doesn't love potatoes?! They are easily one of my favorite side dishes; so versatile and always delicious. Roasted potatoes are one of the easiest things to cook and makes a meal look and feel fancier for some reason. We have a huge rosemary bush in our backyard so I am a fan of any excuse to use it, plus it's one less ingredient to buy at the store. I made them as a side to Roasted Chicken with Rosemary and Lemon for family dinner, but are a perfect side dish for any meal. I hope you enjoy them as much as we do.
Rosemary Roasted Potatoes photo RosemaryRoastedPotatoes_zps423f738f.jpg

Rosemary Roasted Potatoes
Serves: 3-4
Source: Barefoot Contessa

Ingredients:
1 1/2 pounds small red or white-skinned potatoes (or a mixture)
1/8 cup good olive oil
3/4 teaspoon kosher salt
1/2 teaspoon freshly ground black pepper
1 Tablespoons minced garlic (3 cloves)
2 Tablespoons minced fresh rosemary leaves

Directions:
Preheat the oven to 400 degrees F.

Cut the potatoes in half or quarters and place in a bowl with the olive oil, salt, pepper, garlic and rosemary; toss until the potatoes are well coated. Dump the potatoes on a baking sheet and spread out into 1 layer; roast in the oven for at least 1 hour, or until browned and crisp. Flip twice with a spatula during cooking to ensure even browning.

Remove the potatoes from the oven, season to taste, and serve.
Pin It!

Friday, February 22, 2013

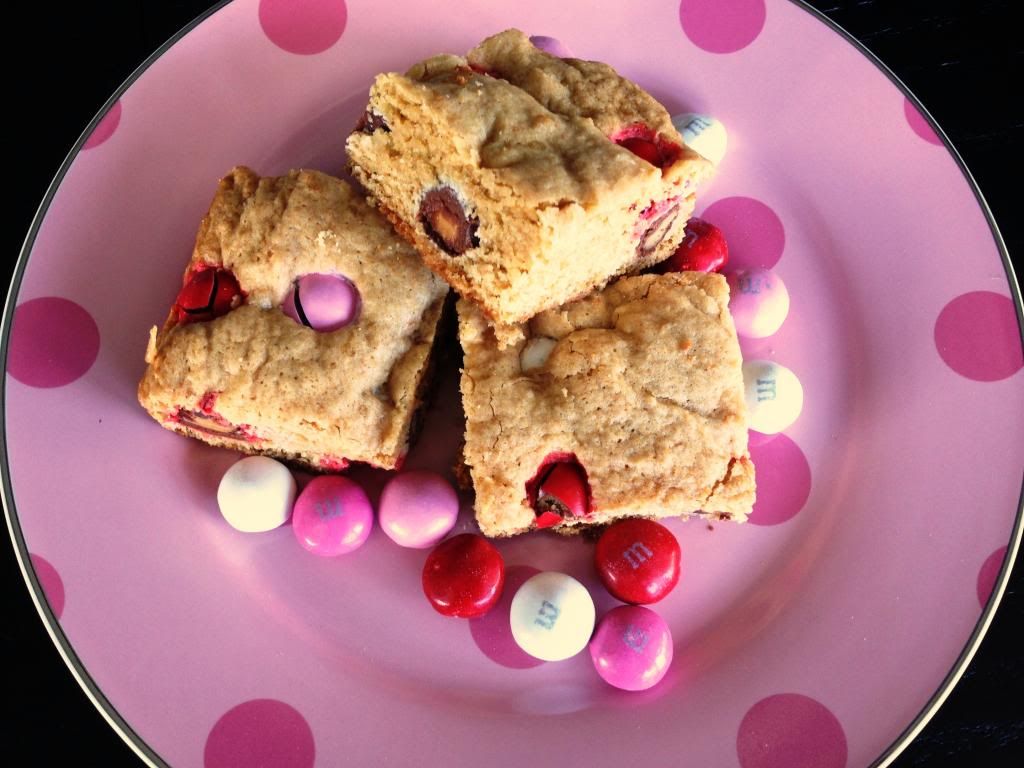
Thick and Chewy M&M Cookie Bars

I am guilty of being suckered in by the holiday clearance section. I just can't resist a good deal, especially on chocolate! Since I would be tempted having an entire bag of delicious peanut butter m&m's in the house I made these thick, chewy yet not dense m&m bars. The original recipe called for plain m&m's but the peanut butter ones made them even better in my opinion, but use whichever flavor you prefer. I tried to cut them into smaller pieces to share with my book club but you can make larger pieces like they do in bakeries. These definitely did not last too long, the peanut butter is addicting!
Thick and Chewy M&M Cookie Bars photo ThickandChewyMampMCookieBars_zps04b99b5f.jpg

Thick and Chewy M&M Cookie Bars
Yields: 28
Source: What Megan's Making

Ingredients:
2 1/8 cups flour
1/2 tsp salt
1/2 tsp baking soda
8 Tbsp butter (1 stick), melted and cooled slightly
4 Tbsp applesauce (substituted for additional butter
1 cup brown sugar
1/2 cup white sugar
1 large egg
1 large egg yolk
2 tsps vanilla extract
12oz bag M&M's, divided

Directions:
Preheat the oven to 325 degrees. Adjust the oven rack to lower-middle position. Line a 9x13 pan with foil and spray with PAM for easy removal; set aside.

In a medium sized bowl, whisk together the flour, salt, and baking soda and set aside.

In a large bowl, whisk the melted butter, applesauce and sugars until combined. Add the egg, egg yolk, and vanilla and mix well. Using a rubber spatula, fold the dry ingredients into the egg mixture until just combined; do not overmix. Fold in 1 cup of M&M's and turn the batter into the prepared pan, smoothing the top with the spatula. Sprinkle remaining M&M's on top and press in slightly.

Bake 25-30 minutes, until the top of the bars is light golden brown, slightly firm to the touch, and edges start pulling away from sides of pan. Cool completely before cutting.

Pin It!

Tuesday, February 19, 2013

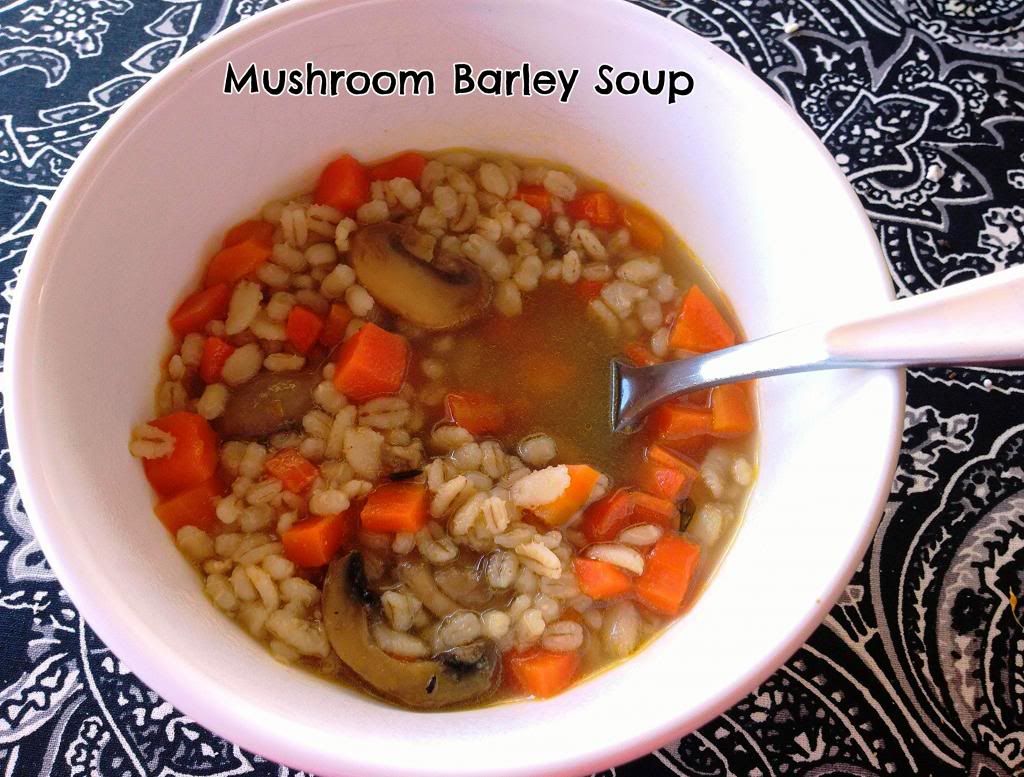
Mushroom Barley Soup

This weekend it was cold here and not just Florida cold, we actually had a frost warning! I know it is nothing to complain about compared to the snow and serious cold weather all over. It is actually nice to have a larger change in temperature and have a glimpse of winter. And of course can use the opportunity to make some hearty and healthy soup before it gets warm again. 

Most of the soups out there can be filled with so much sodium! However, soup can actually be an extremely healthy meal and not hard to make. When possible it is something I like to make a big batch of since it freezes well for another chilly day. The original recipe says it serves 4 people but I think this made a ton! Make sure to cook the barley all the way so it isn't chewy. The barley has a nutty flavor that compliments the mushrooms earthiness. Barley is a great source of fiber, so one bowl will fill you up while also warming you up!
Mushroom Barley Soup photo MushroomBarleySoup_zps78f1f1b8.jpg
Mushroom Barley Soup
Serves: 4-6
Source: Real Simple Magazine

Ingredients:

2 Tablespoons olive oil
1 pound mushrooms, sliced
4 cups carrots, chopped
2 sprigs fresh thyme
kosher salt and black pepper
6 cups low-sodium vegetable broth
¾ cup pearl barley
1 Tablespoon chopped flat-leaf parsley (optional)

Directions:
1. Heat the oil in a large pot over medium-high heat. Add the mushrooms, carrots, garlic, thyme, and ¾ teaspoon each salt and pepper. Cook, stirring occasionally, until the carrots are tender, 8 to 10 minutes.

2. Add the vegetable broth and barley. Simmer, partially covered, until the barley is tender, 30 to 35 minutes. Top with the chopped flat-leaf parsley before serving.

Nutritional Information:
Calories 269; Fat 8g; Sat Fat 1g; Cholesterol 0mg; Sodium 622mg; Protein 8g; Carbohydrate 44g; Sugar 8g; Fiber 11g; Iron 3mg; Calcium 75mg

Pin It!

Friday, February 15, 2013

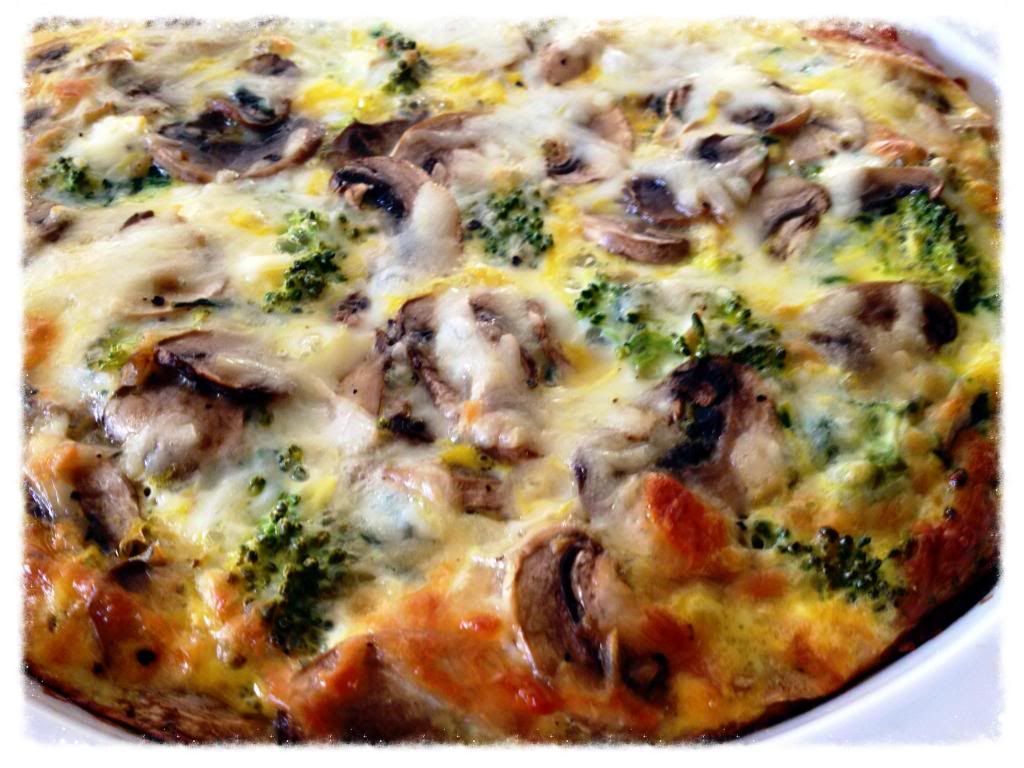
Spinach, Mushroom & Feta Crustless Quiche

My brother and his girlfriend came to visit last weekend, and it was so great to see them and spend some time together! Of course they loved escaping the snow storm back north for the warm weather here. Whenever we have people visit we are reminded of the vacation like state we live in and take for granted. Visitors remind us to take a moment from our busy lives to sit by the pool or in the yard and just enjoy the weather.
 photo b3e94f9a-0368-4390-8a71-f04475612222_zps71e5cd7a.jpg
Another reason I enjoy company is because it gives me the perfect excuse to try out some new breakfast recipes, especially this crust-less quiche. I don't normally make frittatas or quiches because the two of us don't finish them and let's be honest I don't fuss that much in the morning. I try to only make ones that you don't have to partially cook or let set BEFORE going in the oven. The beauty of this recipe is that you only have to saute the mushrooms and then everything else is mixed up and put directly in the dish and you can forget about it while you shower, or in their case play in the pool. I also added in a bit of leftover broccoli with the spinach, so feel free to add that or any other vegetables you want to use up.
Spinach, Mushroom & Feta Crustless Quiche
Serves: 6
Source: The Prairie Kitchen

Ingredients:
10 ounces, weight Frozen chopped spinach (defrosted and drained)
8 ounces fresh mushrooms, sliced
1/2 tsp garlic, minced
2 ounces Feta cheese, crumbled
non-stick cooking spray
1/8 cup Parmesan cheese, freshly grated
5 large eggs
8 ounces skim milk
1/4 cup Mozzarella cheese, shredded
salt & pepper to taste

Directions:
Preheat your oven to 350 degrees. If your frozen spinach is not already thawed, thaw it in the microwave. Empty the box into a colander and let it drain while you begin to prepare the rest.

Quickly rinse the mushrooms and slice them thinly. Place the sliced mushrooms in a skillet coated with non-stick spray, add the minced garlic, and sprinkle a little salt and pepper. Turn the heat on to medium-high and saute the mushrooms until they release all of their moisture and no more water remains on the bottom of the skillet (5-7 minutes)

Spray a pie dish with non-stick spray. Squeeze the rest of the water out of the spinach and spread it out on the bottom of the pie dish. Next add the cooked mushrooms and crumbled feta.

In a medium bowl whisk together the eggs until fairly smooth. Add the milk, Parmesan  and another small sprinkle of pepper. Whisk to combine. (This step can be completed while the mushrooms are cooking) Pour this mixture into the pie dish over the spinach, mushrooms, and feta.

Sprinkle the shredded mozzarella cheese over top. Place the pie dish on a baking sheet for easy transfer into the oven. Place the quiche into the preheated oven and bake until it is golden brown on top and the center is solid. Every oven is different but this should take between 45 minutes. Let it cool 5-10 minutes then slice and serve!

Pin It!

Monday, February 11, 2013

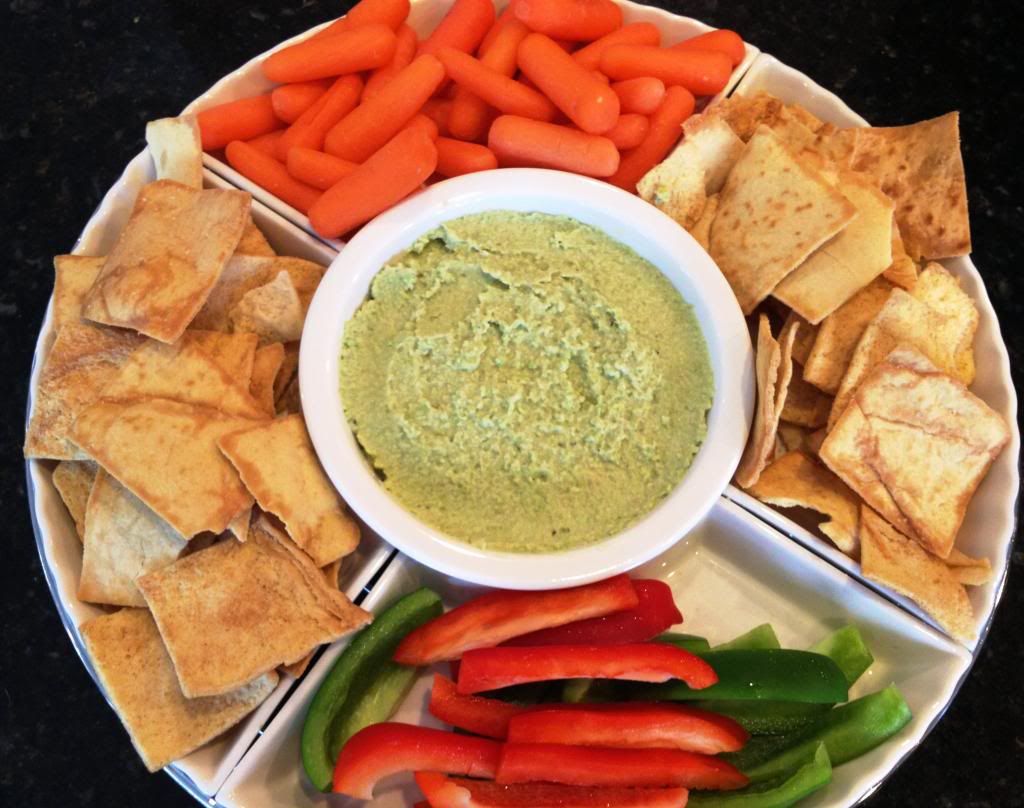
White Bean and Edamame Hummus

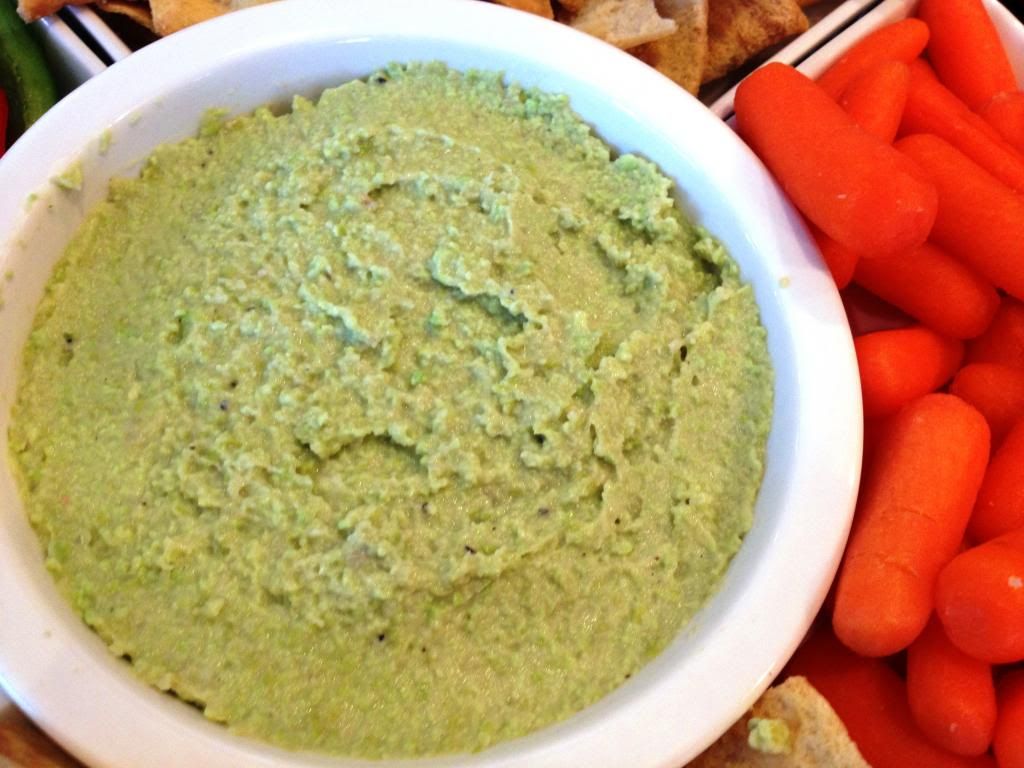
Happy Monday! How is it that the weekends always go by way too quickly?! Here is a great twist on a healthy snack or snack to start your week off right. Who doesn't love traditional hummus...expand your horizons with a different version. I had bought some frozen shelled edamame a while ago and needed a reason to use them. This Asian-inspired recipe uses cannellini beans and edamame instead of traditional garbanzo beans/chick peas, and sesame oil instead of tahini,  giving the green dip a nutty, toasty flavor. The garlic and sesame oil can be a bit overpowering so start with a small amount and you can always add more.
White Bean and Edamame Hummus
Yields: 2.5 cups
Source: Chow.com


Ingredients:
1 (15-ounce) can cannellini beans, drained and rinsed
1 1/2 cups shelled, cooked edamame, thawed if frozen
1 medium garlic gloves, coarsely chopped
1/4 cup water, plus more as needed
3 Tablespoons freshly squeezed lemon juice (from about 2 medium lemons), plus more as needed
2 Tablespoons olive oil
1 teaspoon kosher salt, plus more as needed
1/4 teaspoon toasted sesame oil
Freshly ground black pepper
2 Tablespoons coarsely chopped fresh cilantro (optional)

Directions:
Place the cannellini beans, edamame, garlic, water, lemon juice, olive oil, salt, and sesame seed oil in a food processor fitted with a blade attachment. Season with pepper and process until smooth, scraping down the sides of the bowl as needed. If the dip is too thick, pulse in more water, a tablespoon at a time, until the desired consistency is reached.

Transfer to a medium bowl, add the cilantro, and stir to combine. Taste and season with more salt or lemon juice as needed. Serve with chips or veggies.
White Bean and Edamame Hummus

Pin It!

Sunday, February 3, 2013

Easy scratch brownies

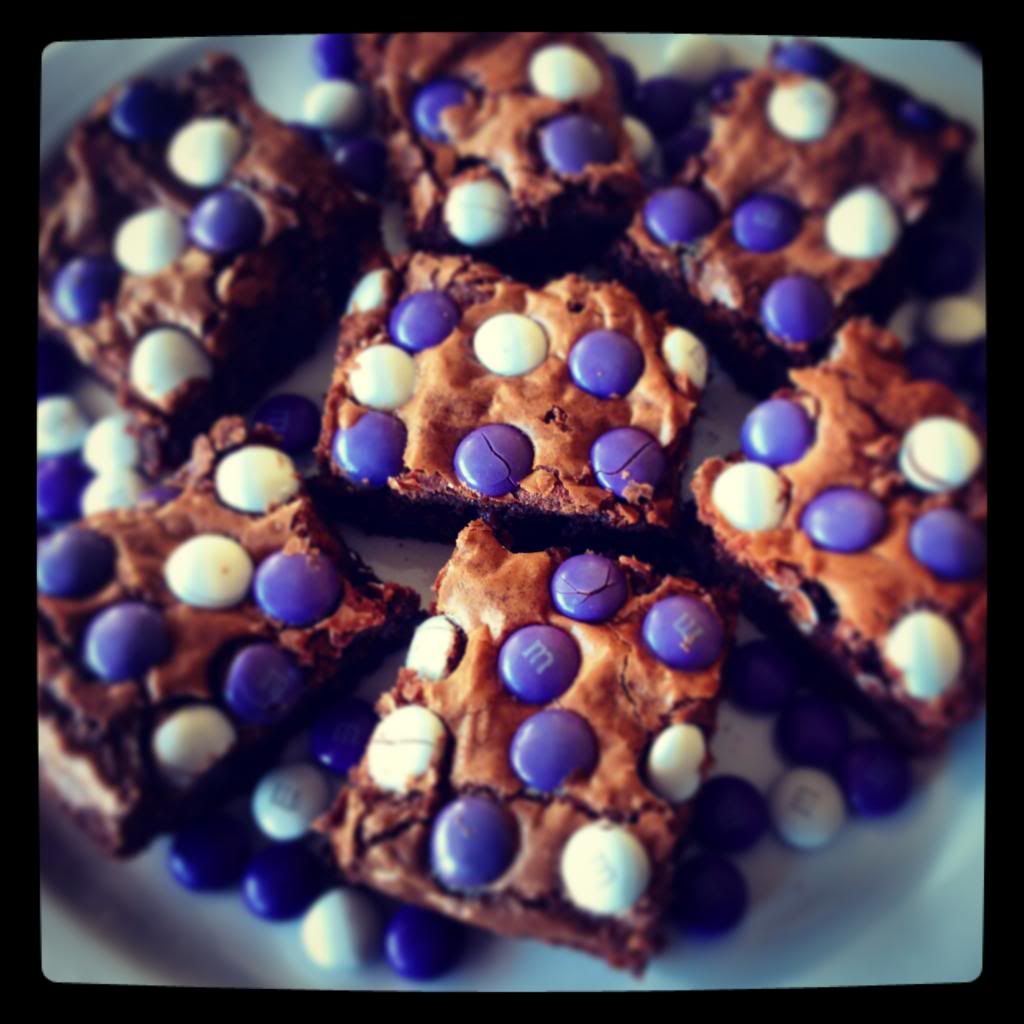
As everyone knows I love pretty much everything chocolate and brownies are no exception. However, brownies are one thing I can't seem to master. This is an easy no fail recipe that has worked every time I have made it. I enjoy the bittersweet chocolate, but my husband prefers the semi-sweet. You can always adjust the ratio of dark to semi sweet chocolate for your preference. I made one batch with all 60% cocoa and another batch that was half semi-sweet and half 60% and was just as tasty.  I was having a friend over to watch the Super Bowl and this was a great go to recipe. To make them a little special for the Super Bowl and our old "home" team the Ravens, I sprinkled purple and white m&m's on top. You can make them plain or add m&m's in any holiday colors.
 photo IMG_1096_zps805ad036.jpg
Easy Brownies
Yields: 12-16
Source: Chow

Ingredients:6 ounces bittersweet chocolate chips (about 1 cup) or coarsely chopped bittersweet chocolate
8 Tablespoons unsalted butter (1 stick), cut into 8 pieces
2 large eggs, at room temperature
1 cup granulated sugar
1 teaspoon vanilla extract
1/2 teaspoon baking powder
1/4 teaspoon fine salt
1 cup all-purpose flour


Directions:
Heat the oven to 350°F and arrange a rack in the middle. Line an 8-by-8-inch metal baking pan with aluminum foil.

Combine the chocolate and butter in a medium saucepan and cook over low heat, stirring frequently, until melted and smooth. Remove from the heat and let cool slightly, about 5 minutes. (Alternatively, melt the chocolate and butter in the microwave, stirring every 30 seconds.)

Combine the eggs, sugar, vanilla, baking powder, and salt in a large bowl and stir with a rubber spatula until just evenly incorporated. Add the chocolate mixture and stir until evenly combined. Add the flour and fold in until just incorporated, about 20 strokes (no white streaks should remain).

Pour the batter into the prepared pan, push it to the edges in an even layer, and smooth the top. Bake until a cake tester or skewer inserted into the center comes out clean, about 25 minutes. Remove to a wire rack and let the brownies cool for at least 20 minutes.

To remove the brownies, grip the excess foil and pull it out of the baking pan. Transfer to a cutting board and cut the brownies into 2-inch squares.

Pin It!