Sunday, December 30, 2012

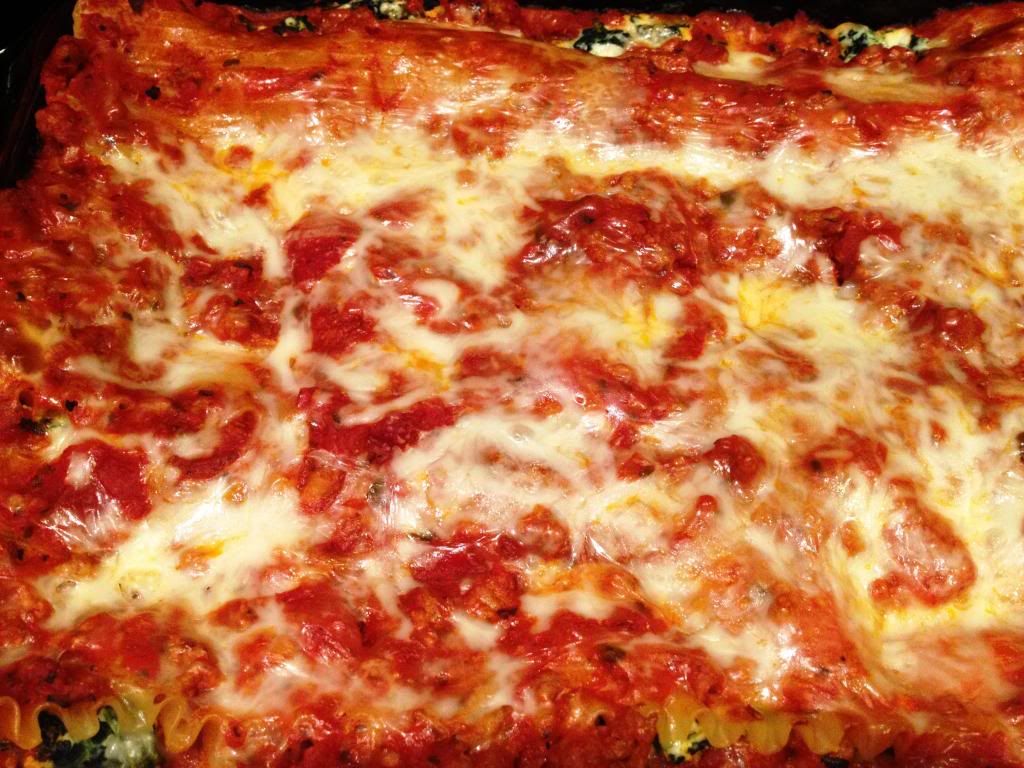
Turkey and Spinach Lasagna

Photobucket

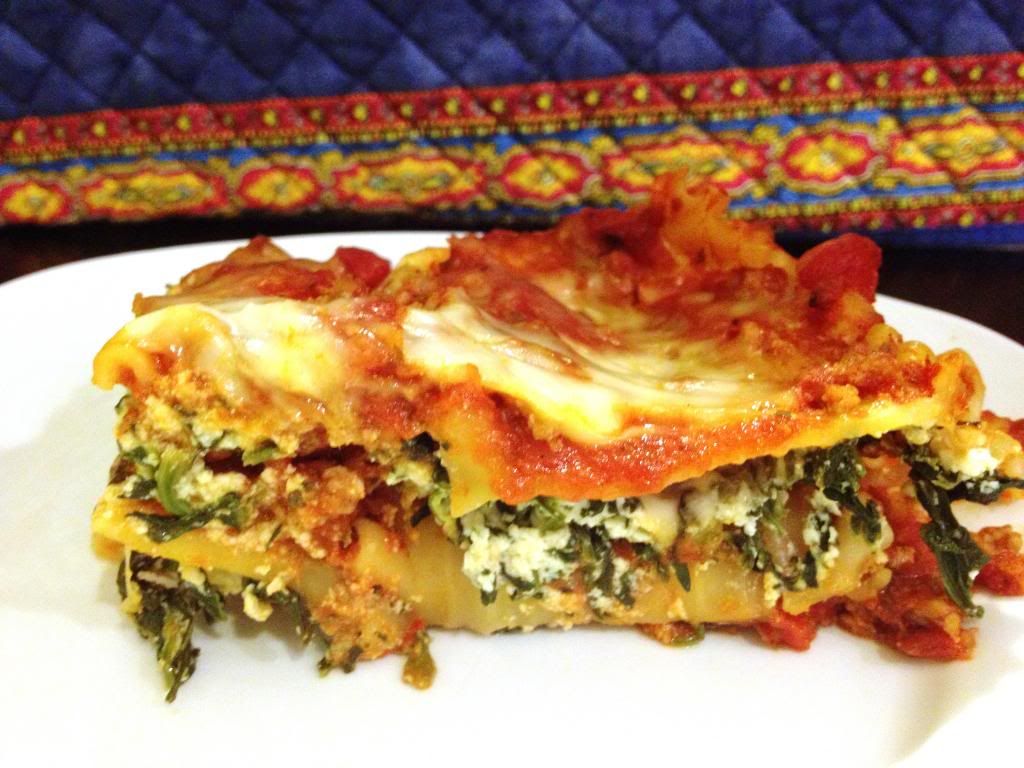
Lasagna is a great way to feed a crowd with not a ton of work, or if you want to have a lot of leftovers. If you are having a group over for the holidays or New Year’s Eve, this is a healthier spin on lasagna that tastes just as great. Jason’s family is Italian so for Christmas there is always a lasagna in addition to the main meal. This year it was just us, so we made this lasagna together to try and incorporate some tradition on the day, but would be good any day! The original recipe called for beef, but we used ground turkey to cut down on the fat and didn't miss the beef. By adding spinach to the lasagna it is a great way to get in some vegetables, especially with kids. The recipe made a ton, so our freezer is full of 2 piece portions to defrost for quick weeknight meals.
Photobucket
Turkey and Spinach Lasagna
Serves: 12
Source:  Taste of Home

Ingredients:
1 pound ground turkey
1 medium onion, chopped
2 jars (24 ounces each) spaghetti sauce
4 garlic cloves, minced
1 teaspoon dried basil
1 teaspoon dried oregano
1 package (10 ounces) frozen chopped spinach, thawed and squeezed dry
2 cups part skim ricotta cheese
1 egg
2 cups shredded part-skim mozzarella cheese, divided
9 no-cook lasagna noodles

Directions:
In a large skillet, cook beef and onion over medium heat until meat is no longer pink; drain. Stir in the spaghetti sauce, garlic, basil and oregano. Bring to a boil. Reduce heat; cover and simmer for 10 minutes. In a large bowl, combine the spinach, ricotta and egg.

Spread 1-1/2 cups meat sauce into a greased 13-in. x 9-in. baking dish. Top with three noodles. Spread 1-1/2 cups sauce to edges of noodles. Top with half of the spinach mixture and sprinkle with mozzarella. Repeat layers. Top with the remaining noodles, sauce and mozzarella cheese.

Cover and bake at 375° for 30 minutes. Uncover; bake 10-15 minutes longer or until bubbly. Let stand for 15 minutes before cutting.
Pin It!

Tuesday, December 25, 2012

Merry Christmas

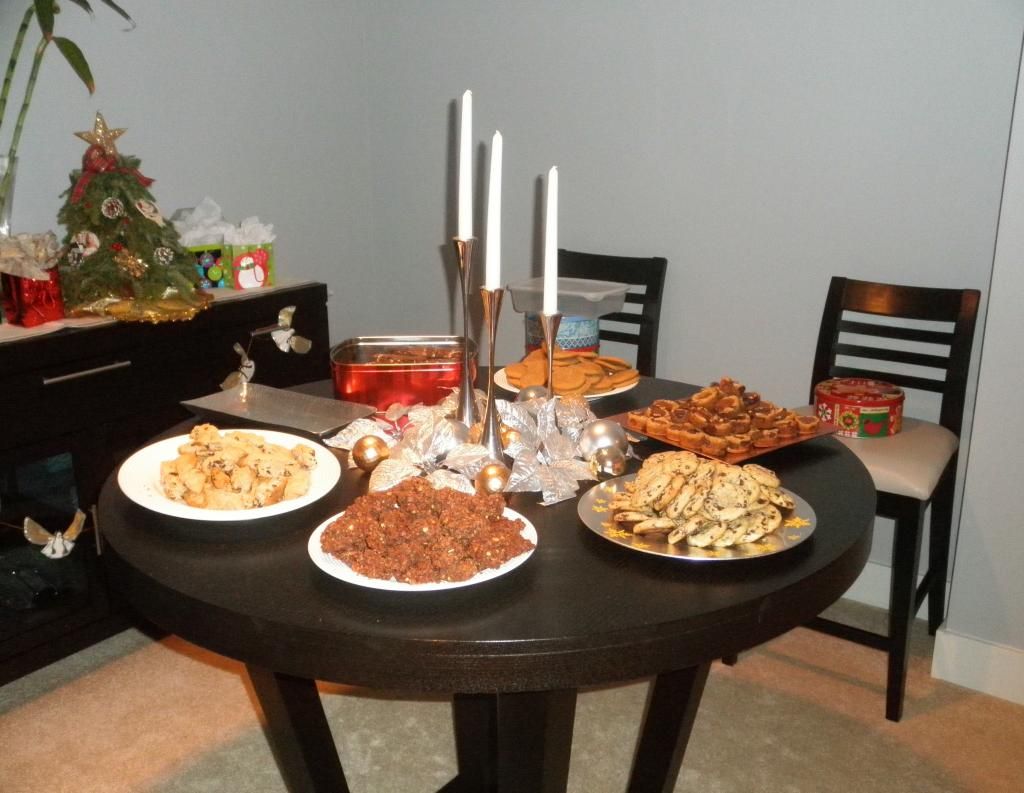
Merry Christmas to all of those who celebrate! This is the first year we haven't had any plans and are home just the two of us. In a way it is nice to have a whole day together to relax and catch up on things around the house. One of the perks to staying home is that I am able to celebrate with my friends through at our holiday cookie exchange. A cookie exchange is a great way to try new cookies and get new recipes. Each person brought 3-4 dozen cookies and the recipe to share, so we ended up taking home 3-4 dozen of a variety. Since it was so close to the holidays this year, those that are hosting part of the holidays are able to use them instead of having to make more food! This was our second year and the group has grown, which means not only more friends, but more cookies! This year we tried to have a more crazy/festive attire, it was so much fun to get dressed up!
Photobucket
And of course, all of the cookies and food were delicious! I will try to post the recipes with pictures throughout the week. We are working our way through a big tin of cookies. I made Andes Mint Cookies that were a hit last year at our family Christmas. 
Photobucket
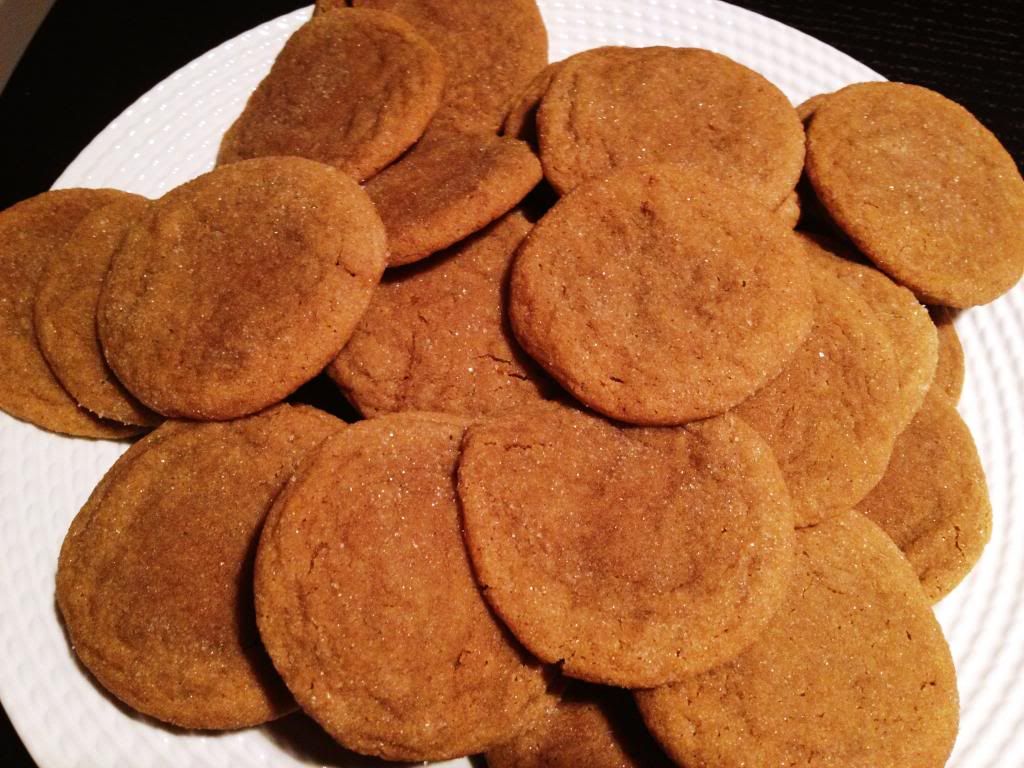
We voted on our favorite cookie and it seemed like everyone one voted for something different! However, we did have a winner, the soft ginger cookie, my favorite! And the best part was my friend who made them had dressed up like a gingerbread man!
The winning soft Ginger cookies

Soft Ginger Cookies
Yields: 2 dozen

Ingredients:
¼ cups flour
2 teaspoons ground ginger
1 teaspoon baking soda
¾ teaspoon ground cinnamon
¼ teaspoon salt
¾ cup margarine or bugger
1 cup sugar
1 egg
¼ cup molasses
½ teaspoon ground cloves
2 Tablespoons granulated sugar

Directions:
1. Preheat oven to 350°F

2. Combine flour, ginger, baking soda, cinnamon, cloves and salt. Set aside.

3. In a large mixing bowl, beat butter on low speed for 30 seconds to soften. Gradually, add the 1 cup sugar and beat until fluffy. Add egg, and molasses, beat well. Stir dry ingredients into mixture. Shape into 1 1/2 inch balls. Roll in sugar and pace on an un-greased cookie sheet about 2 inches apart.

4. Bake at 350 for 8-10 minutes or until light brown and still puffy. Do not overcook! Allow cookies to cool on baking sheet for 5 minutes before removing to a wire rack to cool completely. Store in an airtight container.

Pin It!

Wednesday, December 19, 2012

Chili-glazed Pork with Sweet Potato Hash

Photobucket
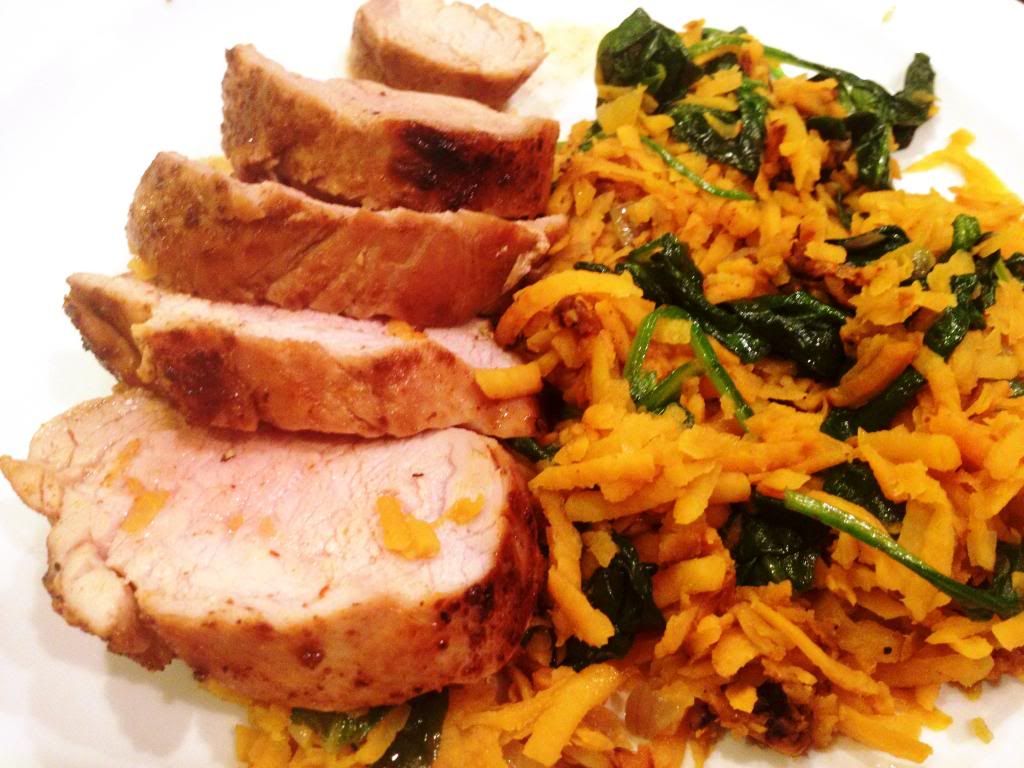
You have made it half way through the week! The week before a holiday is always hard, people have started to leave for vacation and you want to be any place except work. Might as well have a nice dinner while you wait out the rest of the week. I'm a fan of pork tenderloin since it is a lean protein and tends to go on sale. This chili-glazed version has heat from the chili powder and a subtle sweetness from the maple syrup. Paired with a fancier take on sweet potatoes and spinach its a complete meal. By cooking the sweet potatoes with shallots it reminded me of a potato latke only without being fried. 

Chili-glazed Pork with Sweet Potato Hash
Serves 4
Source: Real Simple

Ingredients:

1 pork tenderloin (about 1 1⁄4 pounds)
1 Tablespoon plus 1 teaspoon olive oil
1 teaspoon chili powder
kosher salt and black pepper
2 Tablespoons pure maple syrup
2 medium sweet potatoes (about 1 pound), peeled
2 large shallots, chopped
1 5-ounce package baby spinach, chopped

Directions:1. Heat broiler. Place the pork on a foil-lined rimmed baking sheet. Rub with 1 teaspoon of the oil, the chili powder, and ¼ teaspoon each salt and pepper. Broil, turning occasionally and basting with the maple syrup twice, until cooked through, 10 to 12 minutes (May take longer depending on thickness). Let rest for 5 minutes before slicing.
2. Meanwhile, in a food processor fitted with the coarse grating disk, grate the sweet potatoes.  (If you don't have one you can use a box grater)


3. Heat the remaining tablespoon of oil in a large nonstick skillet over medium-high heat. Add the shallots and cook, stirring occasionally, until beginning to brown, 2 to 3 minutes. Add the sweet potatoes and cook, tossing occasionally, until tender, 7 to 9 minutes more. Add the spinach and cook, tossing, until just wilted, 1 to 2 minutes more. Season with salt and pepper to taste.

4. Serve the pork and potatoes with the hot sauce, if desired.
Nutritional Information:
  • Per Serving
  • Calories 366
  • Fat 10g Sat Fat 2.5g
  • Cholesterol 90mg
  • Sodium 308mg
  • Protein 35g
  • Carbohydrate 33g
  • Sugar 13g
  • Fiber 5g
  • Iron 4mg

Pin It!

Monday, December 17, 2012

Taco Salad

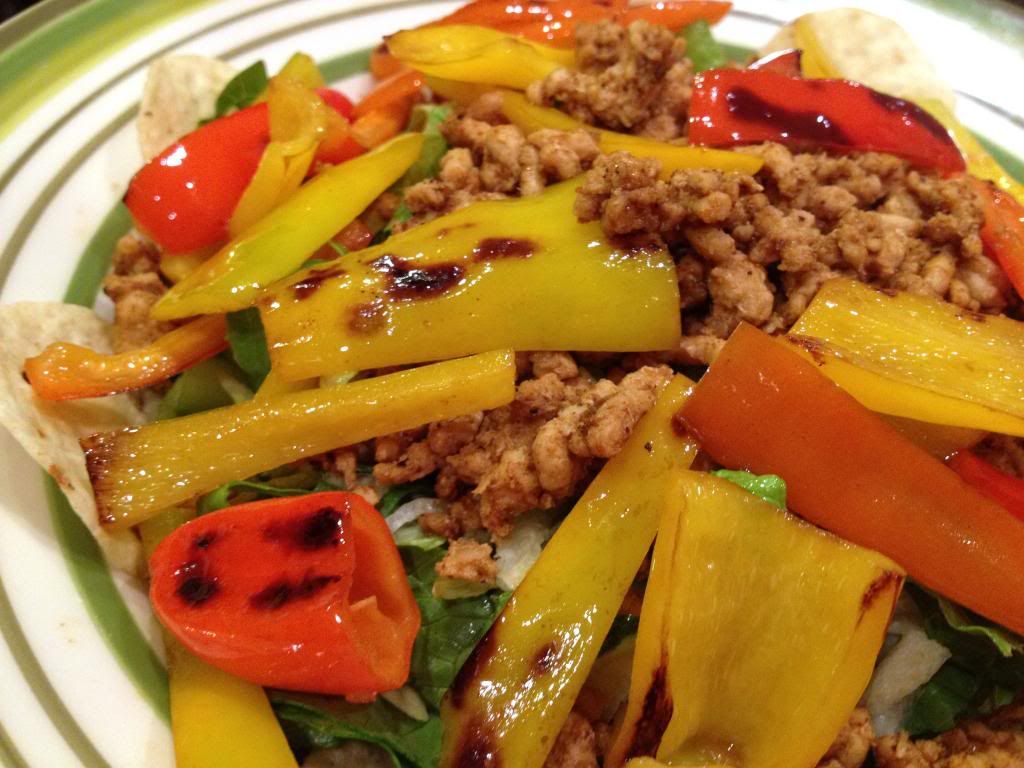
With the holidays upon us, there are so many cookies, desserts, and goodies around the house, office and parties. It can be really hard to resist them at every turn. We are trying to have at least one healthier meal at home and a packed salad is a good opportunity to do so. Normally, we would have tacos, but the shells can add up to a lot of calories and fat. Jason was making dinner tonight and found this recipe for taco seasoning to keep sodium down. It is packed full of flavor with a little kick, but nothing to be afraid of. We used ground turkey instead of beef and layered it on a bed of shredded lettuce, you can buy it pre-shredded or save some money and slice it yourself. Then top with your favorite add-ons like shredded cheese, peppers, corn, salsa and a few tortilla chips for crunch. You don't even miss the the beef or taco shell, all of the flavors are here! This is a quick and easy meal, perfect for a busy weeknight! 
Taco Salad
Taco Seasoning
Serves: 10
Source: All Recipes

Ingredients:
1 Tablespoon chili powder
1/4 teaspoon garlic powder
1/4 teaspoon onion powder
1/4 teaspoon crushed red pepper flakes
1/2 teaspoon paprika
1 1/2 teaspoon ground cumin
1 teaspoon salt
1 teaspoon black pepper

Directions:
In a small bowl combine all ingredients. Store any remaining in an airtight container.

Pin It!

Friday, December 14, 2012

Pumpkin Chocolate Chip Muffins

Happy Friday!! You survived another work week and can now enjoy the weekend. I hope you have some fun holiday plans for the weekend, whether it be holiday shopping or a party
Photobucket

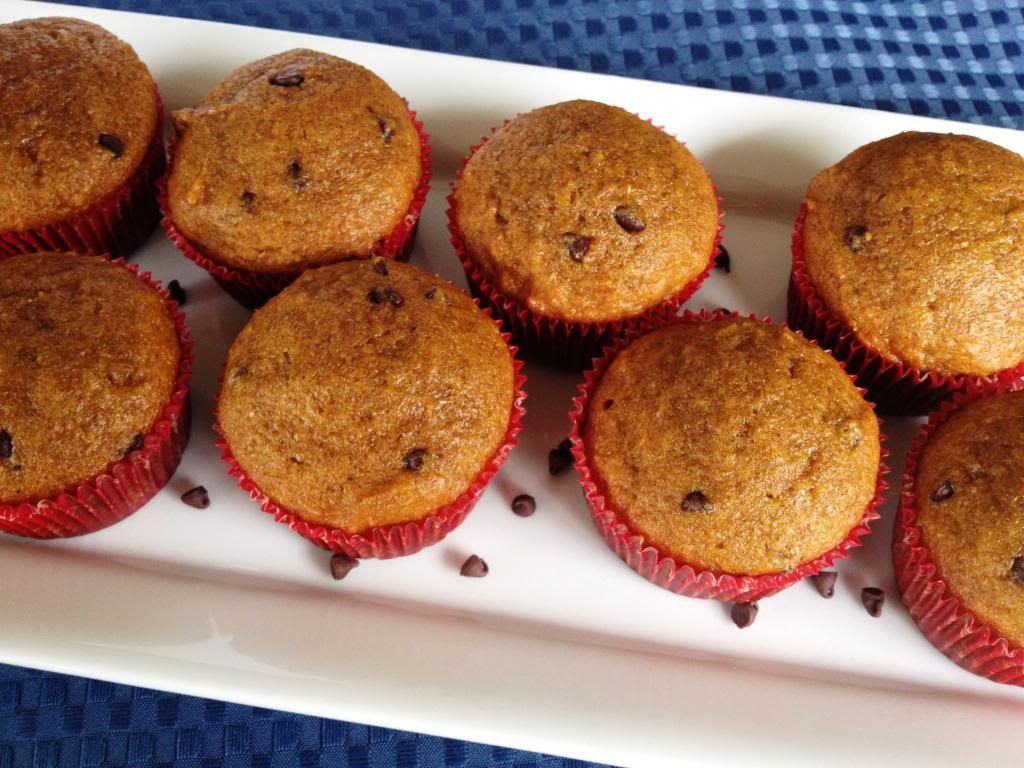
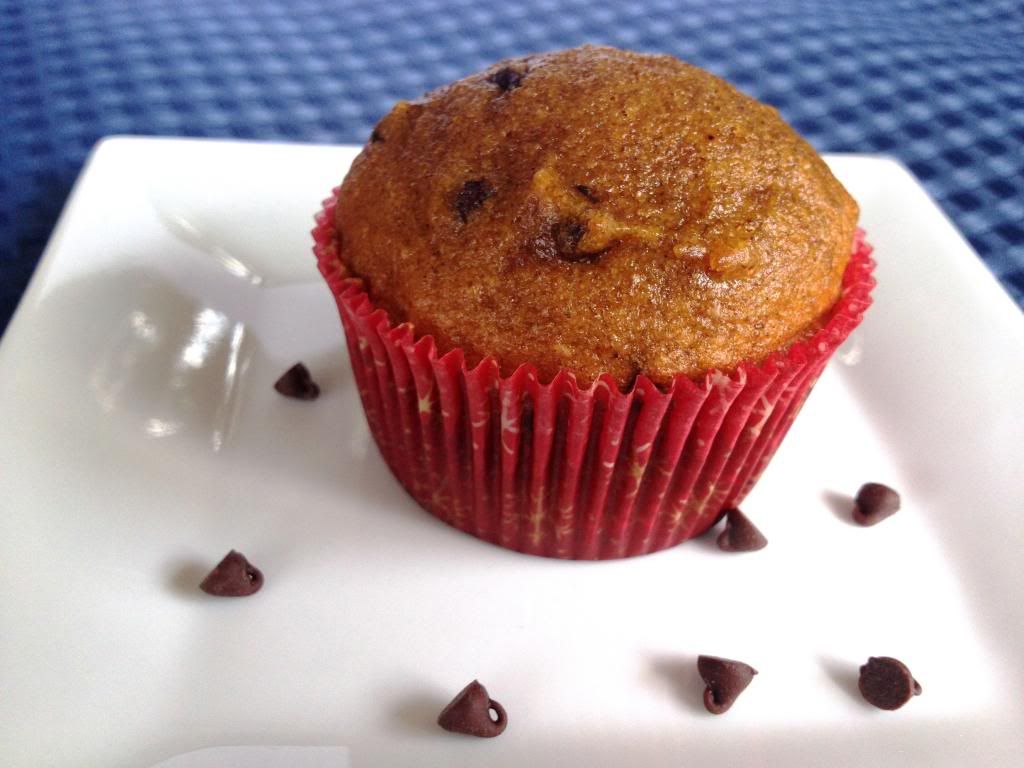
I am trying to break a habit of purchasing muffins or breads from coffee shops like Starbucks and Panera. Besides the fact that they are a rip off and most likely not that good for you, I can make something even better tasting and healthier at home. I have a bit more time now and am trying to bake what I can and freeze them in ready to go bags to prevent a last minute stop/purchase out of hunger. My latest batch were seasonal pumpkin chocolate chip muffins. Anything with pumpkin is good in my book and helps to keep the muffins nice and moist. I love the mini chocolate chips because they distribute better in the muffin and don't overpower it with chocolate flavor. By using whole wheat flour you get in a bit more fiber, but I want to try using some applesauce instead of oil to make them even better for you.
Photobucket
Pumpkin Chocolate Chip Muffins
Yields: 26
Source: eMeals

Ingredients:
1 ½ cups all-purpose flour 
1 ½ cups whole wheat flour 
1 ½ cups sugar 
2 tsp baking soda 
1 ½ tsp pumpkin pie spice
½ tsp salt
2/3 cup canola oil
3 eggs, lightly beaten
15 oz can pumpkin puree
½ cup mini chocolate chips

Directions:
1. Preheat oven to 350. Combine all dry ingredients.

2. Combine oil, eggs and pumpkin in a separate bowl.

3. Add wet ingredients to dry mixture stirring until just moist. Stir in chocolate chips if using.

4. Scoop batter into 28 muffin cups coated with cooking spray or lined with paper liners. You can use a cookie or ice cream scoop to evenly distribute. 

5. Bake at 350 for 18-20 minutes or until inserted toothpick comes out clean. 

Nutrition Information (per muffin): Calories: 180, Total Fat: 7g, Saturated Fat: 1.5g, Cholesterol: 20mg, Sodium: 140mg, Total Carbohydrates: 28g, Dietary Fiber: 2g, Sugars: 17g, Protein: 3g

Pin It!

Tuesday, December 11, 2012

Spaghetti with Kale and Lemon

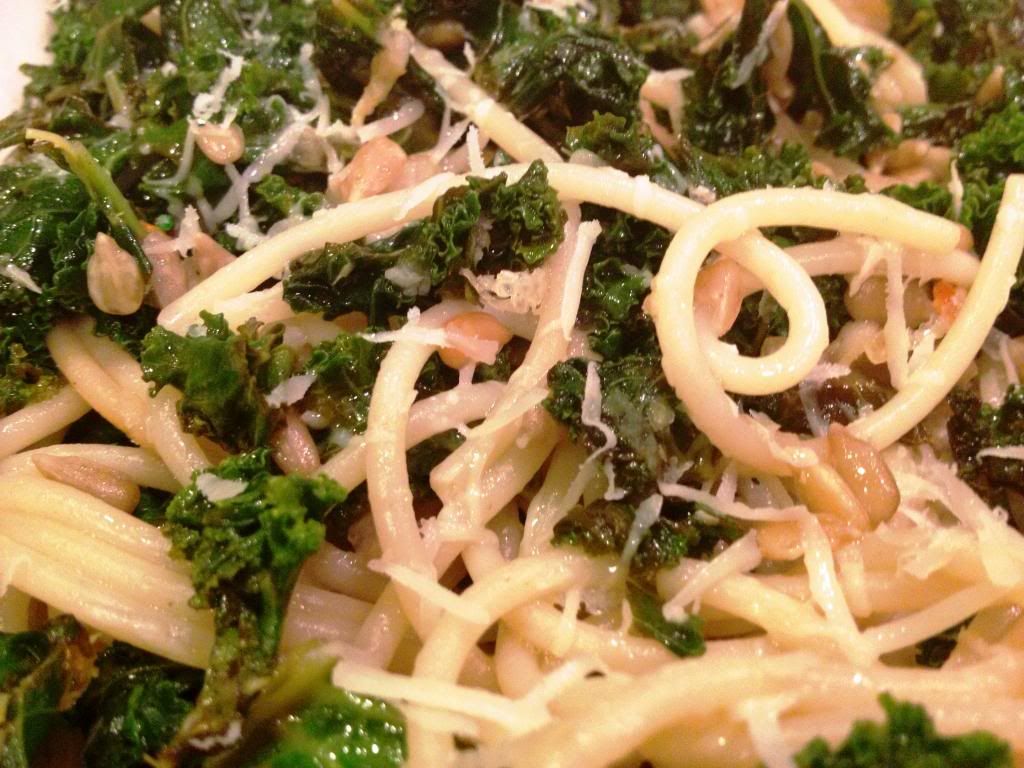
Everywhere I look there seems to be another book, magazine, etc. raving about kale. It is packed full of fiber and  vitamin C, and are also great for your skin, heart and brain. I figured I should finally try it out. There are a few types of kale, I could only find the curly kind at the store, which has a stronger flavor, but might try the flatter or baby kale with a milder flavor next time. The kale is a good alternative to spinach, or can be combined together. The lemon flavor in this recipe give the dish a bright citrus flavor. Pasta is a great way to try out a new ingredient and is quick and easy for a weeknight meal.
Photobucket

Spaghetti with Kale and Lemon
Serves 4
Source: Bev Cooks

Ingredients:
1 pound thin spaghetti
2 Tbs. extra-virgin olive oil
3 cloves garlic, minced
1 pinch crushed red pepper flakes
1 (4 oz) tub of baby kale leaves (or 1 bunch, roughly chopped)
2 Tbs. sunflower seeds
2 Tbs. lemon zest
2 Tbs. fresh lemon juice
1/2 cup freshly grated parmesan cheese, plus a ton more for garnish
coarse salt and freshly ground pepper

Directions:
Bring a large pot of salted water to boil. Cook the spaghetti until al dente. Reserve about 1/2 cup pasta water and drain the rest.

In the meantime, heat the oil in a large skillet over medium-high. Add the garlic and crushed red pepper; bloom for 30 seconds. Add the kale and a pinch of salt and pepper. Toss to wilt the greens. Stir in the sunflower seeds, lemon zest and juice. Toss to combine.

Add the spaghetti to the skillet and toss to combine. Add enough pasta water to create a thin sauce. Finally, add that cheese and toss. Serve with more cheese on top

Pin It!

Sunday, December 9, 2012

Green and Yellow Beans

Photobucket
We actually made these as a healthy side dish for our Thanksgiving meal. It is something that was quick, simple and flavorful. I am a big fan of green beans, just love that crunch and learned that I like yellow beans just as much. The originial recipe calls for wild mushrooms, but we were already having a mushroom stuffing so we omitted them. I included them in the recipe in case you want to incude them as well, but my hubby is not a mushroom fan so doubt I will ever make it with them. If you like some heat feel free to add some crushed red pepper flakes.
Photobucket
Green and Yellow Beans with Wild Mushrooms
10 Servings (3/4 cup each)
Source: Cooking.com

Ingredients:
1lb green beans, trimmed
1lb yellow wax beans, trimmed
3 Tablespoons extra virgin olive oil
2 cloves garlic, minced
8 ounces wild mushrooms (chanterelle, oyster or porcini, trimmed and sliced)
1/2 tespoon kosher salt, divided
Freshly ground pepper to taste

Directions:
Bring a large pot of water to a boil. Add green beans and wax beans and cook until tender-crisp, about 4 minutes. (Cook for another minute or two if you like your green beans more tender). Drain well.
 
Meanwhile, heat oil in a large heavy skillet over medium heat. Add garlic and cook, stirring, until fragrant, about 1 minute. Stir in mushrooms and cook, stirring, until they release their juices and most of the liquid has evaporated, about 5 minutes. Season with 1/4 teaspoon salt and pepper.
Reserve 1 Tablespoon of the mushrooms for garnish. Add the cooked beans to the mushrooms in the pan and cook, stirring to combine, until heated through, 1 to 3 minutes. Season with the remaining 1/4 teaspoon salt and pepper. Serve topped with the reserved mushrooms.

Pin It!

Friday, November 30, 2012

Foodie PenPal Reveal - November

The Lean Green Bean

Happy Friday! I can't believe November is almost over and the holiday are now in full swing! It seems that from Thanksgiving through New Year's is always a whirlwind of food, friends and traveling. I felt like this month's foodie penpals commenced the holiday season with gifts to shop for and receive.

This is my fifth month participating in the Foodie Pen Pals hosted by Lindsay at The Lean Green Bean. It's a great way to "meet" other bloggers and blog readers while also receiving and creating a package! Here is how it works: On the 5th of the month, you will receive your penpal pairing via email. It will be your responsibility to contact your penpal and get their mailing address and any other information you might need like allergies or dietary restrictions. You will have until the 15th of the month to put your box of goodies in the mail. On the last day of the month, you will post about the goodies you received from your penpal! The boxes are to be filled with fun foodie things, local food items or even homemade treatsThe spending limit is $15The box must also include something written. This can be anything from a note explaining what’s in the box, to a fun recipe…use your imagination!
Foodie Penpal - November
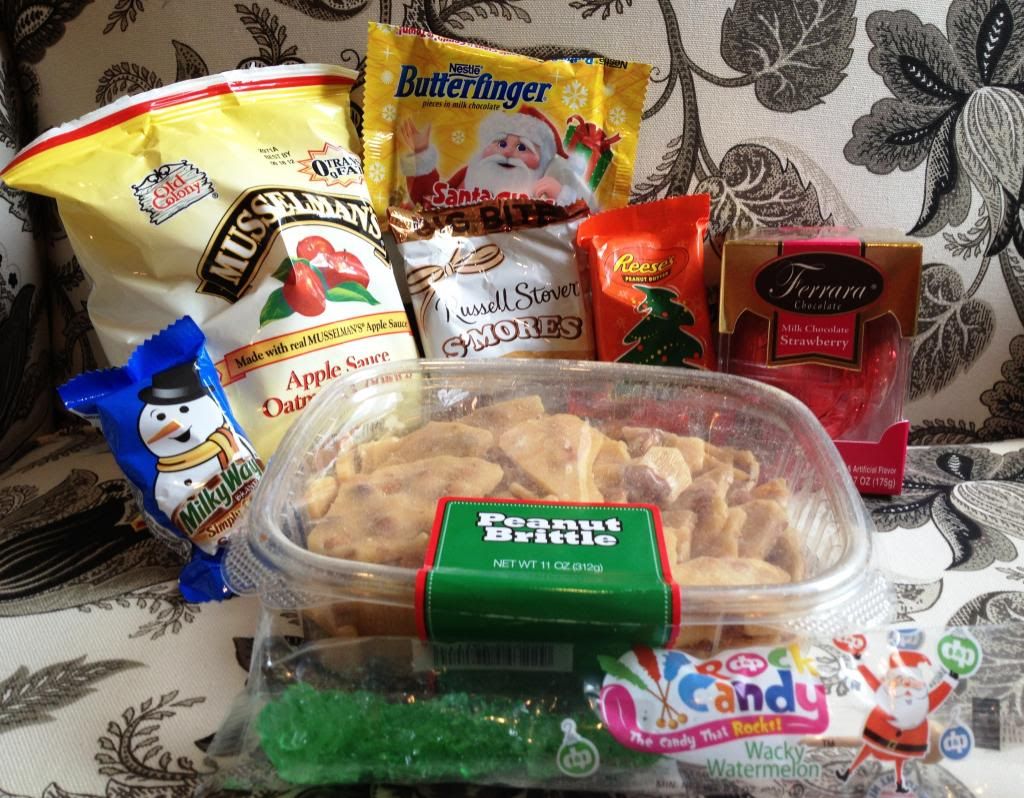
This month I was paired up with Fawn who must have really known me well! I told her a I had a sweet tooth and boy did she send a package catered just for me! I may or may not have consumed most of the items already! Inside was a milkyway snowman, Reese's christmas tree (my favorite), butterfinger santa, peanut brittle (salty and sweet), applesauce oatmeal cookies (sounds healthy!) and some of my childhood favorites, rock candy and chocolate ornament that you crack open to individual slices. We used to get the chocolate oranges that you would hit to break into the orange "segments". So like I said this was heaven in a box! Thank you Fawn!

To see what I sent my match Molly check our her blog Adventures in Impulse.


Pin It!

Thursday, November 29, 2012

Holiday Baking Class

Photobucket
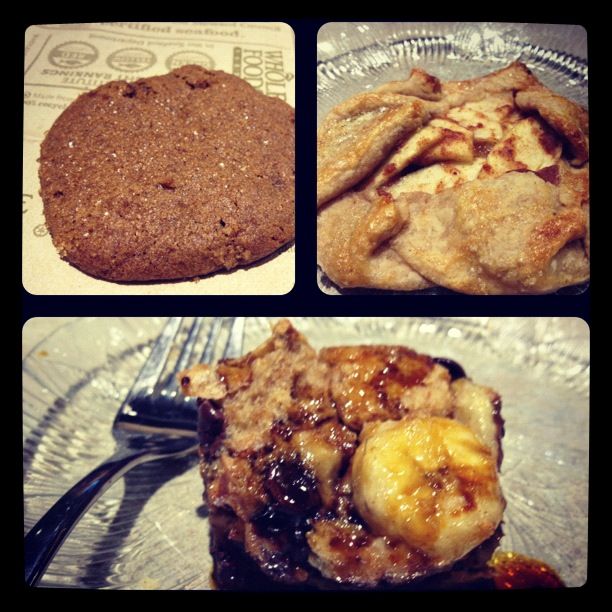
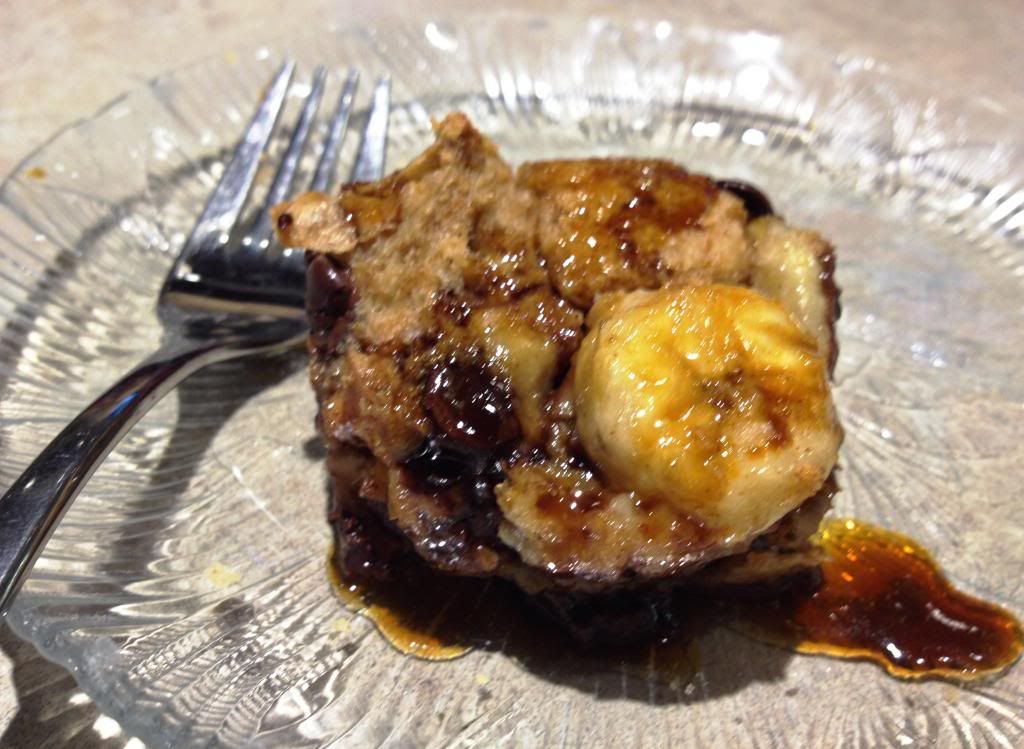
I recently found out about the variety of cooking, baking and healthy living classes that Whole Foods offers in their stores. They are about an hour, cost $5 and are just something different to do. Last night I took a holiday baking class with one of my friends. I haven't taken many cooking classes anywhere because I tend to not love everything on the menu. That was not the case here, the menu online was all desserts I like. The instructor was a trained chef and it felt like I was participating in a live version of all the food shows I watch on tv, but this time could taste the end product. We learned how to make Banana Chocolate Chip Bread Pudding, Chewy Ginger Snap Cookies and a Classic Apple Tart. The great thing about them was that you could make 1 large tart or bread pudding, or individual sized ones. Below is the recipe for our favorite of the night, the bread pudding.

Photobucket

Banana Chocolate Chip Bread Pudding
Serves: 8

Ingredients:
4 cups day old bread, cubed (brioche, challah, or baguette)
2 cups milk
3 large eggs, room temperature
1/2 cup brown sugar
3 ripe bananas
1 cup chocolate chips
2 teaspoons vanilla extract
1 teaspoon cinnamon
1/2 teaspoon nutmeg
pinch of sea salt
Molasses Drizzle:
1/2 cup brown sugar
1/4 cup water
2 Tablespoons molasses
2 Tablespoons butter

Directions:
If the bread is fresh, cut into 1 inch cubes and toast at 350F for 5-10 minutes until dry and toasted on edges. (This helps the bread absorb the filling without turning into mush)

Preheat oven to 350F.

In a large bowl, mash 1 banana and add milk, eggs, 1/2 cup brown sugar, vanilla, cinnamon, nutmeg, chocolate chips and salt. Whisk to combine.

Slice the rest of the bananas into coins and stir into mixture. Add bread and allow to absorb for about 5 minutes.

Place mixtre in a sprayed glass baking dish, (or muffin pan if making individuals) and cook until toothpick inserted comes out clean. About 40-50 minutes for large and 15-20 minutes for individuals.

To make molasses drizzle; combine brown sugar, water and molasses in a sauce pan. Bring to a boil, then add the butter (it will foam a little). Reduce heat to medium-low and simmer 1 minute. Pour sauce over bread pudding as serving.

Pin It!

Tuesday, November 27, 2012

Thanksgiving

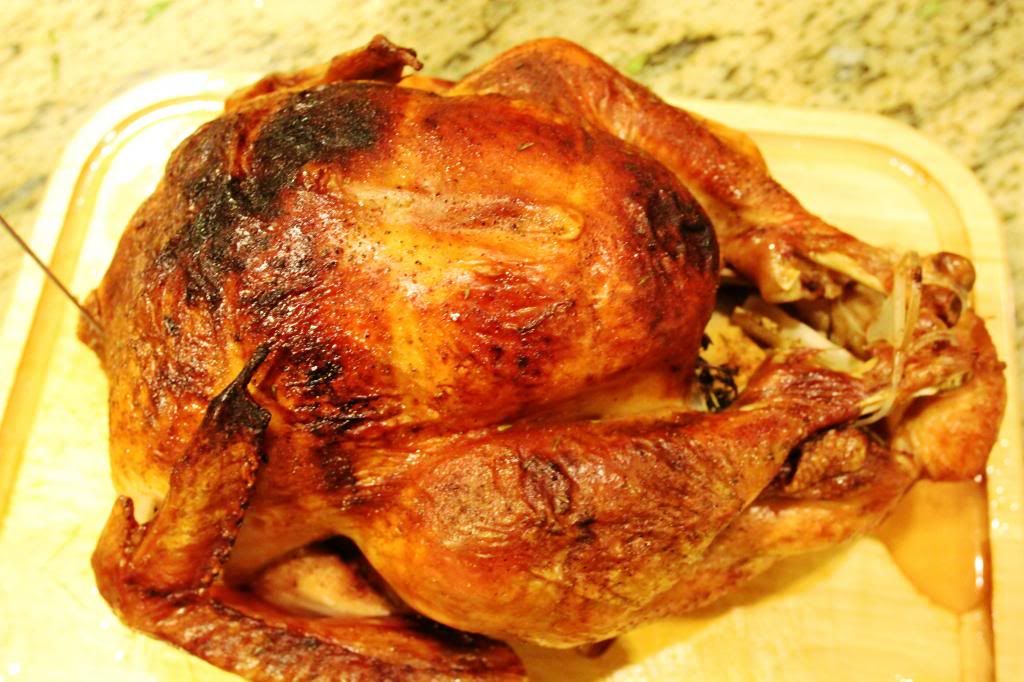
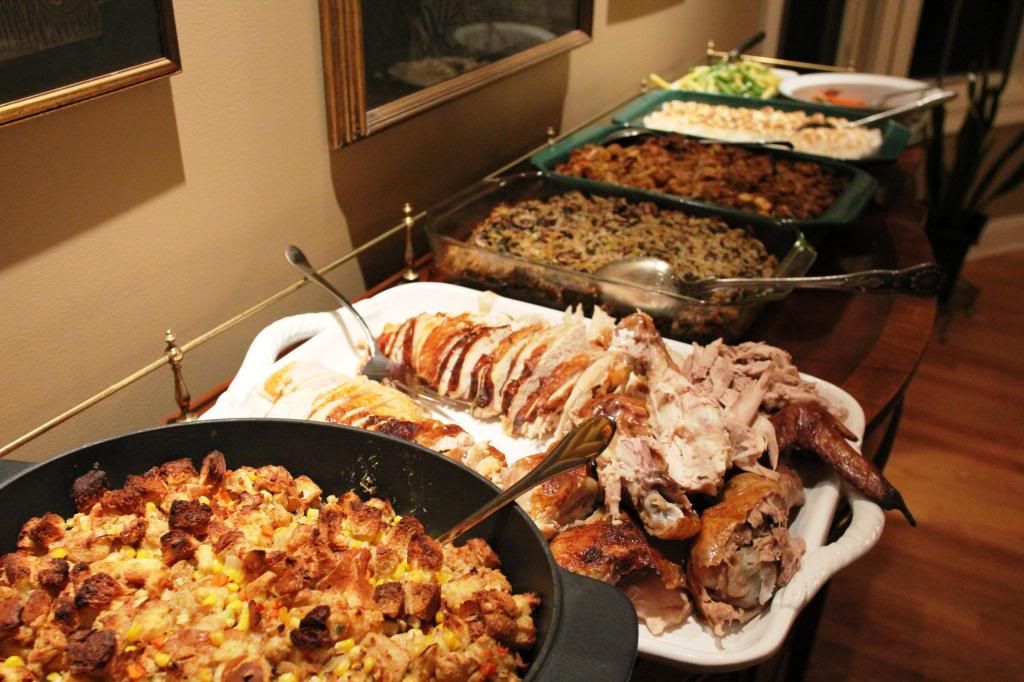
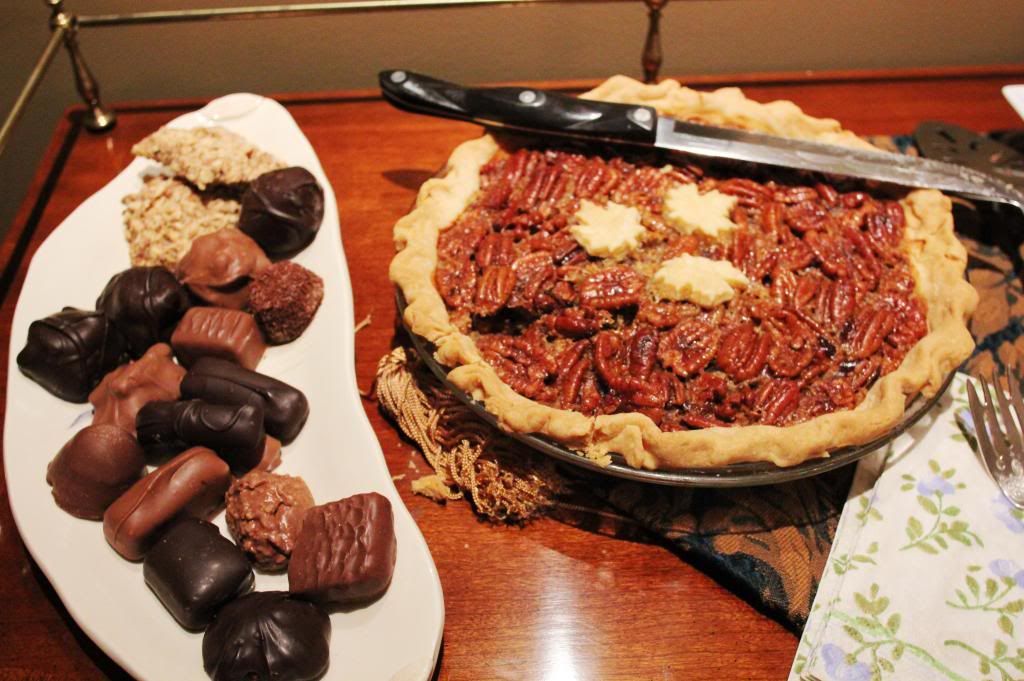
Thanksgiving is my families favorite holiday! We go all out with planning starting weeks in advance to figure out what new recipes to encorporate and which ones to keep from previous years. Regardless, it is always great to be home with my parents, brother and this year both of my grandmas.  I arrived Monday evening and my parents had already done the grocery shopping so I actually got to spend some time with just my mom, which was really nice. We made two cranberry sauces ahead of time to get a jump start on all of the food to come. I highly suggest making whatever you can in advance to cut down on what has to be done the day of Thanksgiving. Wednesday was when everyone else trickled in through out the day and night and all of a sudden it was a full house! My dad is known for his amazing pie crusts, so as soon as he got home, he was put to work on crusts so that my mom and I could make the pumpkin and pecan pies, we save apple until the day of. Finally, Thanksgiving day arrived and we were pretty much all in the kitchen most of the morning and again all afternoon. We were able to squeeze in a family walk with the dog to get fresh air and some exercise before over-indulging. We tried new recipes for all of our stuffings, two new pies and new veggie dishes, it was quite the risk but seemed to pay off. Check out our gorgeous turkey, spread and family:
PhotobucketPhotobucketPhotobucketPhotobucket

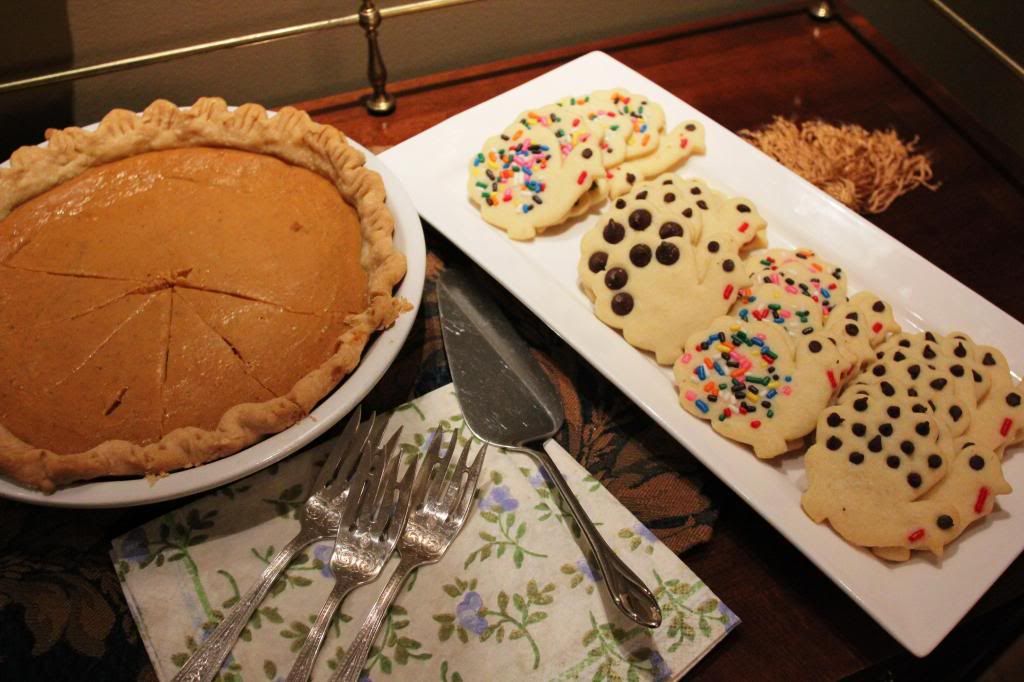
Another tradition we have started is having our family friends over for dessert. We grew up across the street from each other and have since all moved all over. With everyone home for the holidays it has been really nice to have our meals with family and dessert with them. In addition to traditional pies we always make turkey shaped sugar cookies, my brothers favorite. I don't think we had any shortage of desserts!
PhotobucketPhotobucket

This is also a special holiday because my brother was born on Thanksgiving, so despite it not being the same every year we are all together to celebrate his birthday, even if it was a few days early this year ;) Since he had to get back to NYC Friday we celebrated over breakfast with our favorite sour cream coffee cake, it still counts as a birthday cake right? Now it is back home and back to reality until next year.

Photobucket

Pin It!

Tuesday, November 20, 2012

Apple Crisp

With Thanksgiving around the corner this is a classic fall dessert and one you can make instead of an intimidating apple pie. I find fruit crisps are a lot easier to make than pies and are a great way to use fresh fruit that is in season. This one is for apples but I have made cranberry, blueberry and peach crisps as well. You get all of the flavors of apple pie filling but with the added bonus of a crunchy topping, which is the best part! Hope you enjoy this as much as we did!


Apple Crisp
Source: Allrecipes
Serves: 6

Ingredients:
5 cups all-purpose apples, peeled, cored and sliced
1/2 cup white sugar
1-1/2 teaspoons all-purpose flour
1/2 teaspoon ground cinnamon
1/4 cup water
1/2 cup quick-cooking oats
1/2 cup all-purpose flour
1/2 cup packed brown sugar
1/8 teaspoon baking powder
1/8 teaspoon baking soda
1/4 cup butter, melted

Directions:
Preheat oven to 350F.

Place the sliced apples in a 9x13 inch pan. Mix the white sugar, 1 1/2 teaspoons flour and ground cinnamon together, and sprinkle over apples. Pour water evenly over all.

Combine the oats, 1/2 cup flour, brown sugar, baking powder, baking soda and melted butter together. Crumble evenly over the apple mixture.

Bake at 350 degrees F for about 45 minutes.

Pin It!

Saturday, November 17, 2012

Easy Crockpot Pulled Pork

I have always enjoyed having friends and family over, it just makes meals that much better. I had a friend over Friday night after work to catch up. Usually, weeknights can be  tough to get dinner on the table, let alone have friends over...in comes the crockpot! Whoever invented them made life a lot easier. I was able to buy all of the ingredients in advance and just throw them in the crockpot in the morning, allowing it to do all of the cooking while we were all working. By the time our work day was over and my friend came over the house smelled delicious and the pork was nice and tender. This definitely made weeknight meals and entertaining a lot easier and allowed us to just kick back and enjoy our company instead of fussing the kitchen. I made a smaller cut of meat and still had extra left over for lunch the next day!

Easy Crockpot Pulled Pork
Source: My Baking Addiction
Serves: 6-8

Ingredients:
1 large Vidalia onion, sliced thin
2 Tablespoons brown sugar
1 Tablespoon paprika
2 teaspoon kosher salt
½ teaspoon freshly ground black pepper
1 (4-6 lb) boneless pork butt or shoulder
¾ cup cider vinegar
4 teaspoons Worcestershire sauce
1 ½ teaspoons crushed red pepper flakes
1 ½ teaspoons sugar
½ teaspoons dry mustard
½ teaspoon garlic salt
¼ teaspoon cayenne pepper


Directions:
1. Rinse pork roast under cold water and pat dry with paper towels.
2. Place onions in crock-pot. In a small bowl, combine brown sugar, paprika, kosher salt and pepper; mix thoroughly. Rub mixture all over roast and place the roast on top of the onions.
3. In a medium bowl, combine vinegar, Worcestershire, red pepper flakes, sugar, mustard, garlic salt and cayenne pepper; whisk to combine. Drizzle about 1/3 of vinegar mixture over roast. Cover and refrigerate remaining vinegar mixture.
4. Cover crockpot; cook on low for 10-12 hours. Drizzle about 1/3 of reserved vinegar mixture over roast during last ½ hour of cooking.
5. Remove meat and onions; drain. Chop or shred meat and onions. Serve with remaining vinegar mixture or your favorite barbeque sauce.


Pin It!

Thursday, November 15, 2012

Butternut Squash Soup

Aside from pumpkin, butternut squash is something that reminds me of fall. I got suckered into buying a big container of pre-cut butternut squash at Costco. There is something about that place that you always come out with a cart full of stuff that you didn't go in needing. Needless to say, I had to find a way to use it all up and I love butternut squash soup. I particularly liked that this recipe doesn't require you to roast the squash ahead of time, making it quicker and one less pan to clean. It was extremely flavorful and even met approval of my skeptical husband, so all around a success. It is perfect for lunch or dinner on a cold fall/winter day.


Butternut Squash Soup
Slighty adapted from: Giada De Laurentiis
Serves: 4-6

Ingredients:
2 Tablespoons butter, at room temperature
2 Tablespoons extra-virgin olive oil
1 medium onion, chopped
1 medium carrot, peeled and chopped into 1/2-inch pieces
2 cloves garlic, minced
3 1/2 pounds butternut squash, peeled, seeded, and cut into 3/4-inch pieces (about 7 to 8 cups)
6 cups low-sodium chicken stock
1/4 cup chopped fresh sage leaves
Kosher salt and freshly ground black pepper

Directions:
In an 8-quart stockpot, add the butter and oil and melt together over medium-high heat. Add the onion and carrot and cook, stirring occasionally, until the onion is soft, about 5 minutes. Stir in the garlic and cook until aromatic, about 30 seconds. Add the squash and the chicken stock. Bring the mixture to a boil and add the sage. Continue to boil until the vegetables are tender, about 20 minutes. Turn off the heat. Using an immersion blender, blend the mixture until smooth and thick. Season with salt and pepper, to taste. Keep the soup warm over low heat.

To serve, ladle the soup into bowls.

Note: The cooked vegetable mixture can also be pureed (after cooling for about 5 minutes) by ladling, in batches, into a food processor or blender and blended until smooth.

Pin It!

Sunday, November 11, 2012

Peanut Butter Snickers Cookies

Some of my girlfriends here are into game nights. I had never participated in any until moving here but always thought board games were fun. They have turned into a fun and different get together with them. So far a different person has hosted each time and we all bring a snack for the group. This time I was trying to use of the final remnants of our Halloween candy and made Peanut Butter Snickers Cookies. Let's just say they were addicting before I even took them over. One of the girls made funfetti cake waffles, both creative and delicious, another made adorable elmo cupcakes and another made also addicting chili dip with cream cheese, chili, cheddar and onions. We were all pretty stuffed by the end and had a great time catching up and playing ridiculous games.
 

Peanut Butter Snickers Cookies
Yields: 24 cookies
Source: Sweet Pea's Kitchen
 
Ingredients:
1¼ cups all-purpose flour
¾ teaspoon baking soda
½ teaspoon baking powder
¼ teaspoon salt
½ cup unsalted butter, softened
1 cup creamy peanut butter
¾ cup granulated sugar
½ cup firmly packed light brown sugar
1 egg
1 tablespoon milk
1 teaspoon vanilla extract
1½ cups chopped Snickers candy bars (about 9 fun size bars)
¾ cup milk chocolate chips
Directions:
Preheat the oven to 350 degrees F. Line a two baking sheets with parchment paper; set aside.

In a medium bowl, whisk together the flour, baking soda, baking powder, and salt; set aside.

In the bowl of a stand mixer fitted with the paddle attachment, beat the butter and the peanut butter together until fluffy, about 2 minutes. Add the sugars and beat until fully incorporated. Add the egg and mix until combined, about 30 seconds.

Add the milk and the vanilla extract and mix until combined. Stir in flour mixture until just combined. Stir in chocolate chips and chopped snickers stirring until no flour pockets remain.

Drop by heaping tablespoons (about 2 ounces each) onto the prepared baking sheets, spacing 2 inches apart. Gently flatten each cookie ball with the palm of your hand. Bake for 7-10 minutes, or until cookies are slightly brown on the edges.

Cool the cookies on the baking sheets set on a wire rack for 5 before transferring to a wire rack to cool completely.

Pin It!

Monday, November 5, 2012

NY Style Crumb Cake


Anyone who is from the tri-state area knows what I am talking about when I refer to New York style crumb cake. It has a soft white cake bottom and is piled high with addicting brown sugar crumbs on top. Luckily, there are a ton of New York style deli's in Florida where we can get our fix without taking a flight. However, my father-in-laws birthday is this week and crumb cake is one of his favorites. I had never made one before but figure this was a pretty good reason to try. Now I say that it yields 9 pieces because sometimes you just have to have more than 1 piece. This recipe is originally from Cooks Illustrated who can pretty much master anything and they definitely did here. The crumbs were sweet and crumbled off while the cake was still moist and delicious. I was lucky to get even a picture in before it was all gone :) We ate it for dessert but is also perfect in the morning with coffee or tea.


New York Style Crumb Cake
Source: Brown Eyed Baker originally Cooks Illustrated
Yields: 9 pieces

Ingredients:
For the Crumb Topping
1/3 cup granulated sugar (2 2/3 ounces)
1/3 cup dark brown sugar (2 2/3 ounces)
3/4 teaspoon ground cinnamon
1/8 teaspoon table salt
8 tablespoons unsalted butter (1 stick), melted and still warm
1 3/4 cups cake flour (7 ounces)

For the Cake
1 1/4 cups cake flour (5 ounces)
1/2 cup granulated sugar (3 1/2 ounces)
1/4 teaspoon baking soda
1/4 teaspoon table salt
6 tablespoons unsalted butter (3/4 stick), cut into 6 pieces, softened but still cool
1 large egg
1 large egg yolk
1 teaspoon vanilla extract
1/3 cup buttermilk
Confectioners' sugar for dusting
Directions:
To make the Topping: Whisk sugars, cinnamon, salt, and butter in medium bowl to combine. Add flour and stir with rubber spatula or wooden spoon until mixture resembles thick, cohesive dough; set aside to cool to room temperature, 10 to 15 minutes.
To make the Cake: Adjust oven rack to upper-middle position and heat oven to 325 degrees. Cut 16-inch length parchment paper or aluminum foil and fold lengthwise to 7-inch width. Spray 8-inch square baking dish with nonstick cooking spray and fit parchment into dish, pushing it into corners and up sides; allow excess to overhang edges of dish.
3. In bowl of standing mixer fitted with paddle attachment, mix flour, sugar, baking soda, and salt on low speed to combine. With mixer running at low speed, add butter one piece at a time; continue beating until mixture resembles moist crumbs, with no visible butter chunks remaining, 1 to 2 minutes. Add egg, yolk, vanilla, and buttermilk; beat on medium-high speed until light and fluffy, about 1 minute, scraping once if necessary.
4. Transfer batter to baking pan; using rubber spatula, spread batter into even layer. Following photos below, break apart crumb topping into large pea-sized pieces and spread in even layer over batter, beginning with edges and then working toward center. Bake until crumbs are golden and wooden skewer inserted into center of cake comes out clean, 35 to 40 minutes. Cool on wire rack at least 30 minutes. Remove cake from pan by lifting parchment overhang. Dust with confectioners' sugar just before serving.

Note: Don't be tempted to substitute all-purpose flour for the cake flour, as doing so will make a dry, tough cake. If you can't find buttermilk, you can substitute an equal amount of plain, low-fat yogurt. When topping the cake, take care to not push the crumbs into the batter. This recipe can be easily doubled and baked in a 13 by 9-inch baking dish. If doubling, increase the baking time to about 45 minutes. Cooled leftovers can be wrapped in plastic wrap and stored at room temperature for up to 2 days.

Pin It!

Wednesday, October 31, 2012

Foodie PenPal Reveal - October

The Lean Green Bean


Happy Halloween! How is it already the end of October?! This is my fourth month participating in the Foodie Pen Pals hosted by Lindsay at The Lean Green Bean. It's a great way to "meet" other bloggers and blog readers while also receiving and creating a package! Here is how it works: On the 5th of the month, you will receive your penpal pairing via email. It will be your responsibility to contact your penpal and get their mailing address and any other information you might need like allergies or dietary restrictions. You will have until the 15th of the month to put your box of goodies in the mail. On the last day of the month, you will post about the goodies you received from your penpal! The boxes are to be filled with fun foodie things, local food items or even homemade treatsThe spending limit is $15The box must also include something written. This can be anything from a note explaining what’s in the box, to a fun recipe…use your imagination! Sometimes that is my favorite part, especially if there is a story behind the items in your package.


This month I was paired with Jenny from The Spicy Simmer. She sent me a combination of all sorts of foods and even indulged my sweet tooth with some Halloween candy (I may or may not have eaten that day), strawberry fruit strips and plaid cat double chocolate cookie mix which I can't wait to make! There were a lot of items my husband would enjoy, a snack pack of almonds (his favorite), Jane's crazy mixed up salt for marinades & seasoning that will be great on the grill and mini star shaped pasta that reminded him of pastina from growing up. Now that it finally cooled down here the pasta and vegetable bouillion cube would be great in a soup!

To read about what I sent to my blogger check out Courtney's blog Knits N Bits 4 U.

Pin It!